How to Customize Your Own Website Design on Gutensite

Like many other hosted website builders, Gutensite allows you to easily create a simple and beautiful website in as little time as it takes you to figure out what you want to say. And because of its robust framework, advanced functionality, and ability to customize anything , Gutensite has become a refuge for non-profit and business websites that realize they need more than just a pretty online brochure and contact form.
If you want to stand out from the crowd and make sure your website brings you value, you need to optimize the design and functionality of your website to help you achieve your unique conversion goals . A good website should empower your clients/members and integrate with your existing business processes. On the Gutensite platform, you can work with directly their team or a third party designer/developer to customize your design and functionality. Or if you are ambitious you can customize the design the yourself and this tutorial will show you how.
Gutensite provides many beautiful, free design templates to get you started, so you can either tweak the template that is closest to what you want, or start completely from scratch. If you are a designer (or just adventurous), you can access the design files to work directly with the HTML, CSS and Javascript. Gutensite also uses the Smarty templating engine to introduce logic and system variables into your HTML, so it’s very powerful.
Getting Started
From your Admin home page in the main “Content” tab, click on the “Design” icon and in the left sidebar, click on “ Design Files ”.
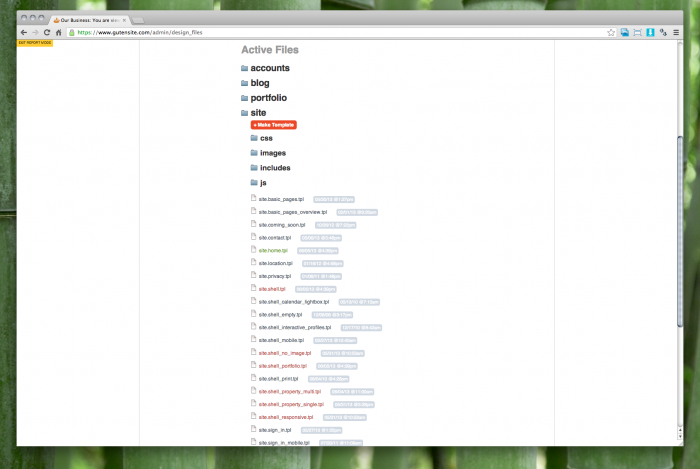
On this page you will see the structure of your website, with folders related to whatever content types you have activated on your site. Gutensite has core system files that all websites use, but it will first look in your template to see if a “better” version of the file exists and use that instead. And if you customize a file personally for your website, the system will use that file instead of the template or core file. The folder view shows all these files as if they were “stacked” on top of each other so you can only see the “best” version. Colors are used to indicate which version your site is using:
-
black : the default core system files.
-
red : files that have been customized for the template you are using.
-
green : files that you have customized for yourself.
Whenever you edit a file, the CMS makes a copy of the core or template version and puts it in your custom files. You can easily restore the original if you make a mistake.
Which Files to Edit
Gutensite uses common file extensions to help you figure out which file to edit:
- HTML/Smarty (layout and elements): .tpl
- CSS (styling): .css
- Javascript (interactivity): .js
Each content type has it's own folder (e.g. /blog/), but all the generic website files are located in the /site/ folder. Below are some common files you may want to edit:
-
Layout
- Home Page: /site/site.home.tpl
- Secondary Pages Shell: /site/site.shell.tpl
- This is the shell that surrounds all the secondary pages content.
- You can create custom shells for special landing pages or sections if you want, e.g. /site/site.shell_Store.tpl and then in the CMS you can assign a single page or an entire section of the site to use that alternative shell.
- Header: /site/includes/site.header.tpl
- Usually a reusable header file is included in the home page and shell.
- Footer: /site/includes/site.footer.tpl
- Usually a reusable footer file is included in the home page and shell.
- Modules: /site/includes/site.module.*.tpl
- These are the templates for various promo modules you may include on your home page or other pages.
- Content Type Layouts: e.g. /blog/blog.home.tpl or /blog/blog.details.tpl
- Any special content types will have their own folder and generally consist of a list page (multiple records on a page) and a details page (single record on a page).
-
Style
- Site Design Styles: /site/css/site.css
- These styles will load on every page of the site.
- Core Styles: /site/css/core.css
- These styles will also load on every page of the site, and include some default styles that the CMS will use. It can be customized or completely gutted and replaced with your favorite CSS framework (e.g. Twitter Bootstrap). But be aware that you probably want to keep some of the default classes for errors and other system generated content.
- Content Type Styles: e.g. /blog/css/blog.css and /blog/css/core.css
- Any special content types (e.g. blog) has it’s own css that you can customize, which works just like the general /site/ content type.
- Site Design Styles: /site/css/site.css
Example 1 – Changing Font and Color
Let’s say we want to change the default font and theme color of our template. The first thing we should do is go to our website and use your browser’s developer tools to “inspect element” that has the color we want to change in order to find the CSS that is styling these elements. Every browser has a developer mode (which you need to enable) that will let you do this. If you use Chrome, read this tutorial explaining how to inspect elements (it will be similar for other browsers).
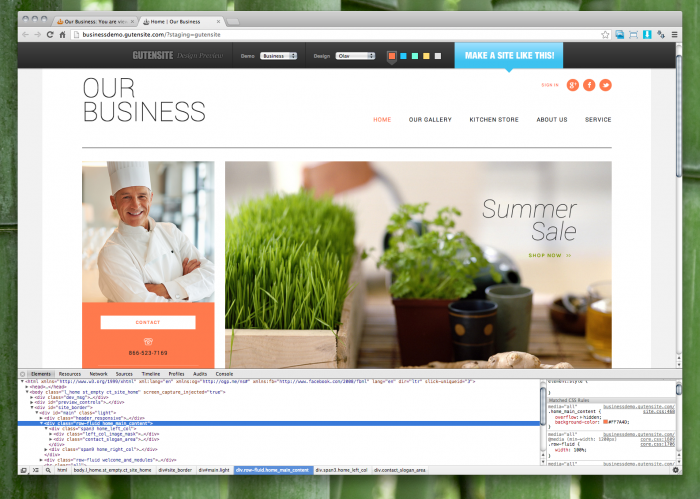
Use the inspector to click through the DOM to find the element that has the styles. You can change the values directly in the inspector to test your new styles live.
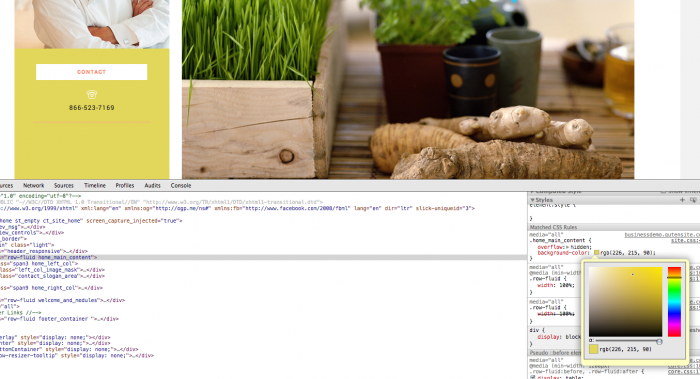
The inspector will also tell you the file where the css is located (e.g. site.css) and the class or id name controlling the style for that element.
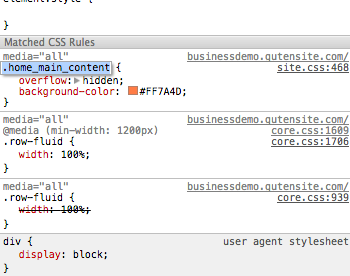
Once you know the file and class, you can find and edit the design file in the Admin and make the change. In this case, we’ll edit the .home_main_content class in / site/css/site.css and change the background-color from #FF7A4D to #E2D75A .
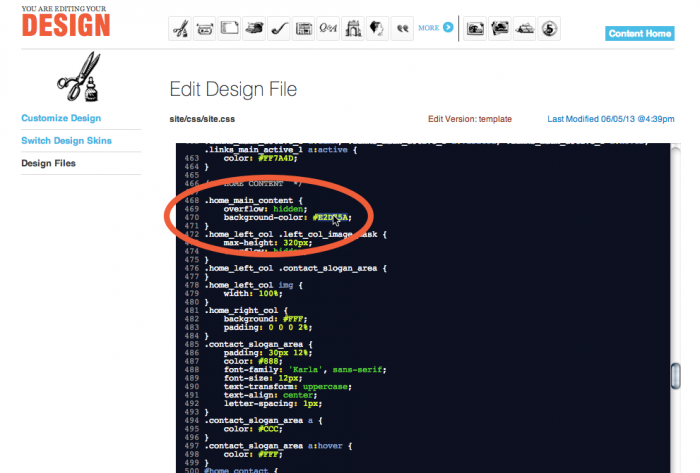
You may want to search the rest of the CSS for the original value and swap out your new value so that the new color is used everywhere the old color was used.
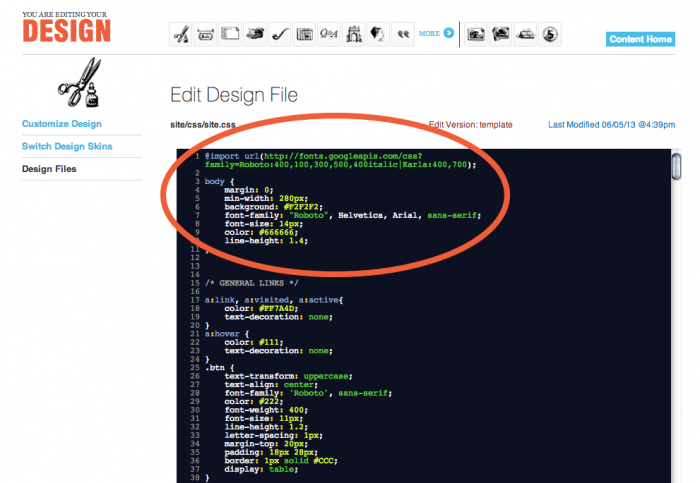
To change the font, repeat the process to find the font for a specific element. Or if you want to change the font for the entire site, edit the same /site/css/site.css file and at the top you’ll see the body element styles, i.e. change: “font-family” to some acceptable font style. We recommend using Google Fonts for free and easy fonts to include beyond the basic web fonts. You can use @import method to add the font to the top of your CSS and follow their tutorial for more instructions .
Example 2 – Add Variables or Logic to your Templates
Let’s say you want to add a custom button to the Shell that goes back to the last page the user was on, but if they visited the page directly you want the button to go back to a default page.
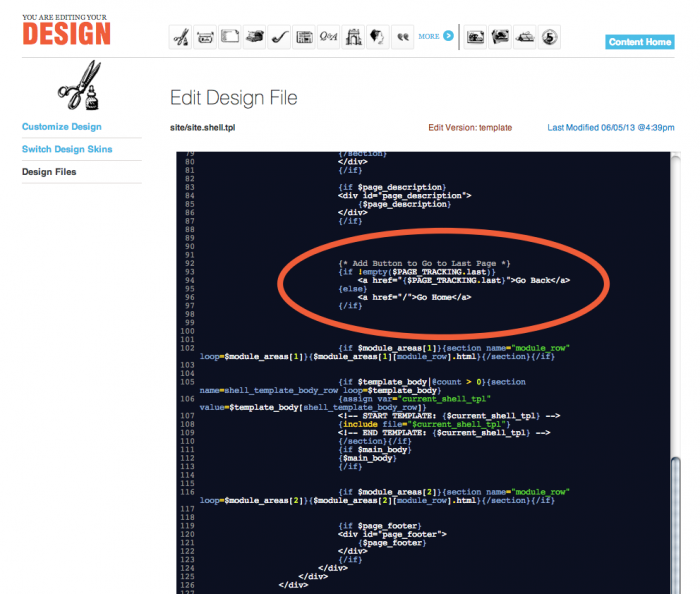
So first you want to edit the template file, e.g. /site/site.shell.tpl and add the element to the html. You can find a list of available variables by looking at the Gutensite 1.0 docs variable page . You can also add {debug} to the template and then view your page in report mode (http://www.domain.com?report=gutensite) which will make Smarty show you all the variables that are available (in a popup window).
The variable we want is {$PAGE_TRACKING.last} (which shows the url for the last visited page). After we know the variable, we just just use Smarty to add some logic around a link to go back to the previous page. Something like this:
{* Add Button to Go to Last Page *}{if !empty($PAGE_TRACKING.last)} <a href="{$PAGE_TRACKING.last}">Go Back</a>{else} <a href="/">Go Home</a>{/if}
This is just a very basic introduction, but Gutensite's open framework allows you to literally customize anything within your skill level. To learn more, read through Gutensite's advanced design editing documentation or call their customer service and ask for help. Happy coding!