Teach Coursework with WordPress - Sensei Review
If you've ever taken an online course, you've experienced the fine work of developers and programmers who have worked very hard. CMSs for education are notoriously difficult to manage. WooThemes and their new plugin, Sensei, set out to change that. Their new tool, “the learning management plugin for WordPress, was released in January.
Introduction
Sensei is exclusively a WordPress plugin. Since WordPress is the world's most popular CMS, this is a great choice. Sensei is easy to use, even for someone who is not familiar with using a CMS. Anyone familiar with WordPress will find the plugin very easy to use.
Sensei a Japanese martial arts term, meaning “teacher” or “person born before another.” The term applies to this plugin.
Features
Sensei is not what you would call a “really powerful” plugin. In other words, you're not going to make Coursera. The features it does provide, however, are sufficient. Here's what you can do:
- Create an unlimited courses
- Create lessons within courses
- Set course and lesson prerequisites
- Create quizzes with required pass percentage
- Set custom lesson length requirements
- Embed videos of any kind to the lessons
- User registration for students taking the course
- Complete course analytics and student information
- Learner access to dashboard to track progress
- Custom theming options
The plugin interface looks and feels like many other plugin. Creating lessons and courses is easy using the familiar WordPress post creation.
Getting Started with Sensei
(Note: I tested the plugin using a privately hosted WordPress 3.5.1 site using the Standard Theme.)
The first step to Sensei is, quite obviously, installing it. I navigated to my WordPress site's plugin page, selected the 253 KB zip file, and clicked “install now.” Within ten seconds, the plugin was successfully installed.

After selecting “activate plugin,” I was redirected to my plugin page, where I was provided with a welcome message.

It was time to do some schooling.
Using Sensei
The plugin provides me with an icon in the sidebar with and five menu items. We'll go through each one of these.
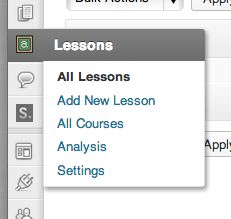
Here's the screen I was looking at when I clicked on the Sensei icon.
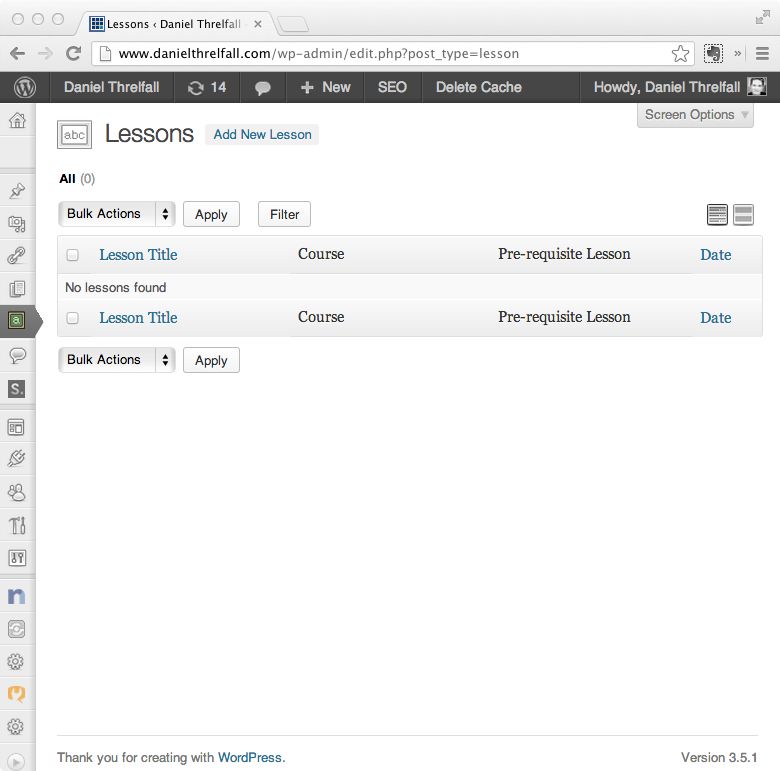
The plugin page looks just like the main page for creating new posts. Instead of categories like “author” or “tags,” the Sensei plugin featured the titles “course” and “prerequisite lesson.”
Add New Lesson
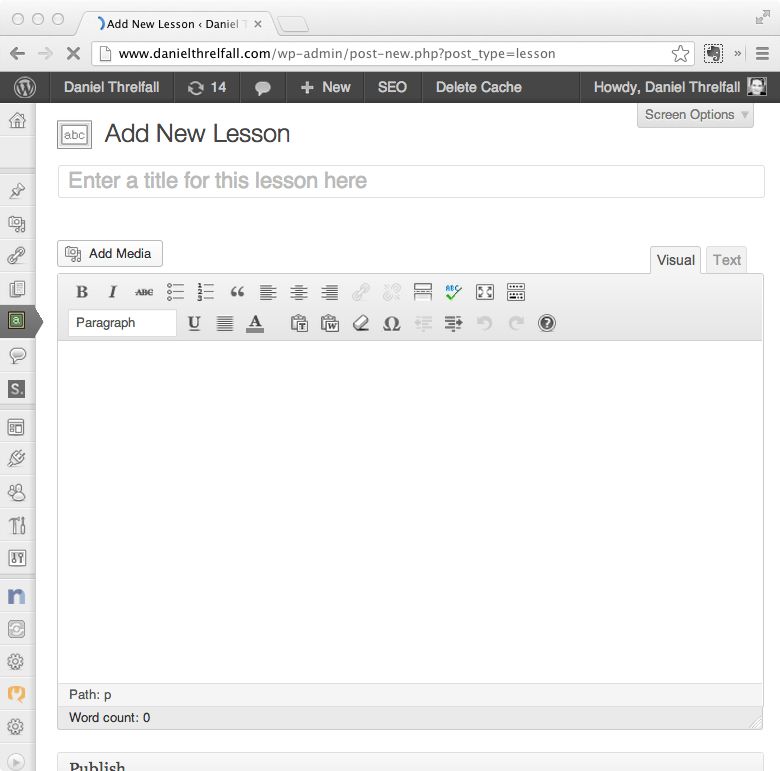
My first step was to add a new lesson.
This was familiar territory, since it mimicked the features and layout of typical post creation.
Unlike typical posts however, adding a new lesson displayed the following additional features below the main field:

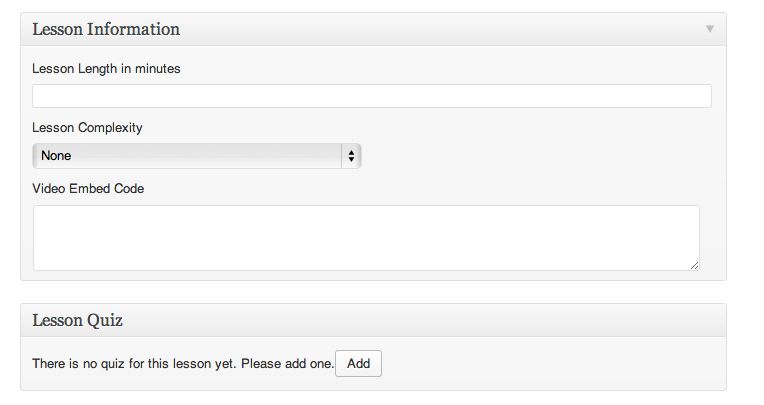
I went ahead and wrote a mock lesson and published it. In doing so, it was necessary to create a new course and assign this particular lesson to that course. If this action is not completed, the course will not be available for viewing or taking from the main page.
When I visited my blog home page to take the course, the first thing I noticed was the addition of two category tags in my header menu: “Courses” and “My Courses.”

Clicking “My Courses” brings me to the main page for courses that I published.
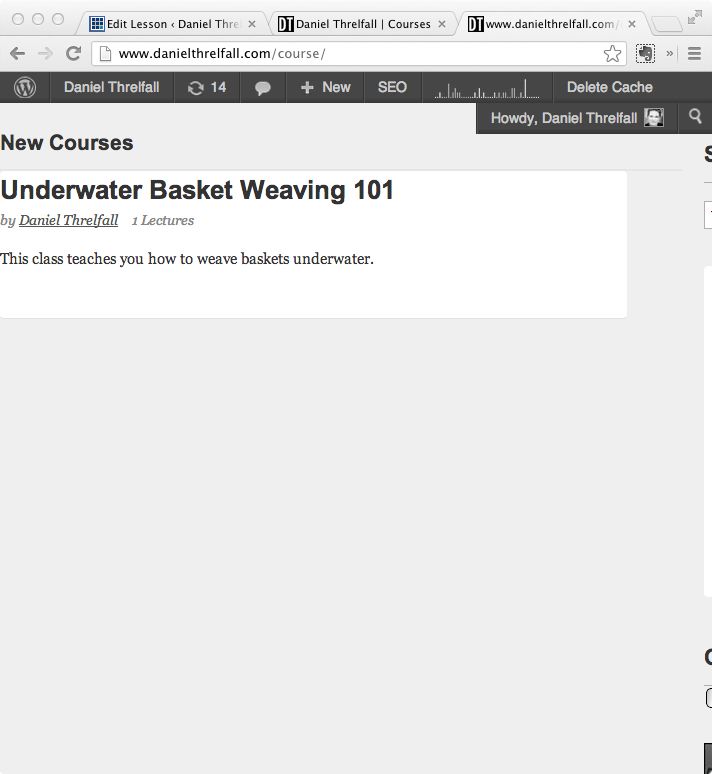
Let's take the class.
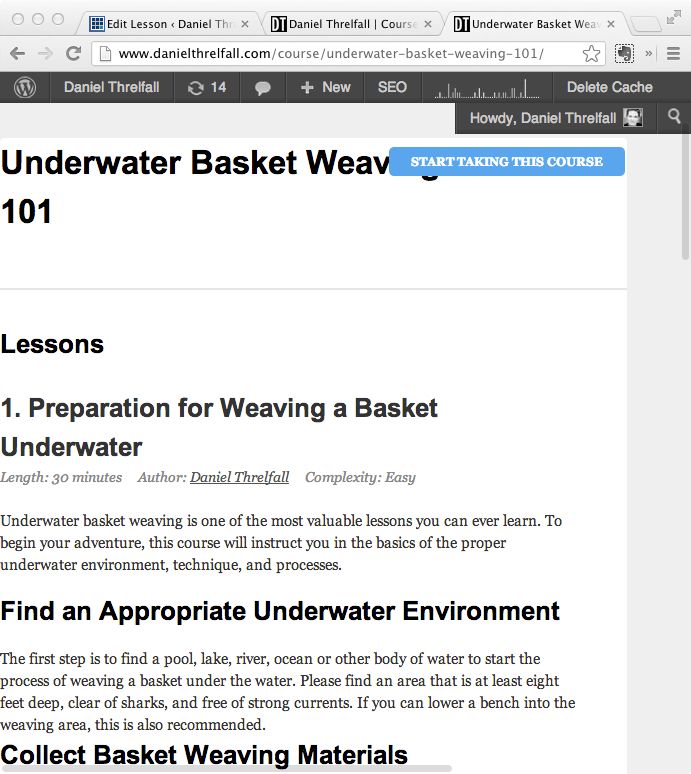
What follows is a simple display of the lesson that I created. I clicked on the blue button to “start taking this class.”
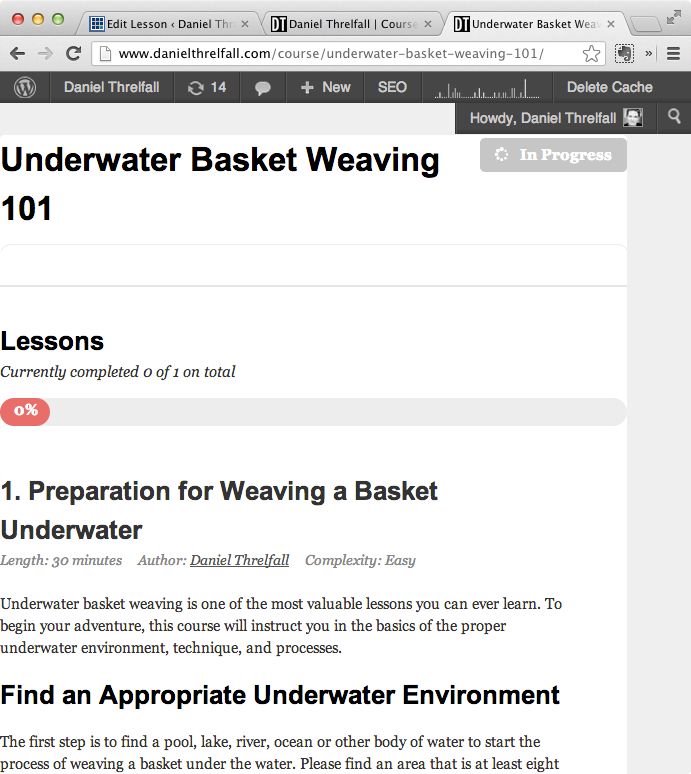
What follows is the lesson display, along with a progress bar.
It was unclear to me how to set the lesson to completed. The “In Progress” notification appeared on the lesson whenever I looked at the lesson.

“Create New Lesson” is where the real work of course development happens. You are provided with a full editor, plenty of options, and access to all the familiar plugins that you have installed. The nice thing about creating lessons is that there is no learning curve for typing or creating a new lesson.
All Courses
Next, I chose to view “All Courses.”
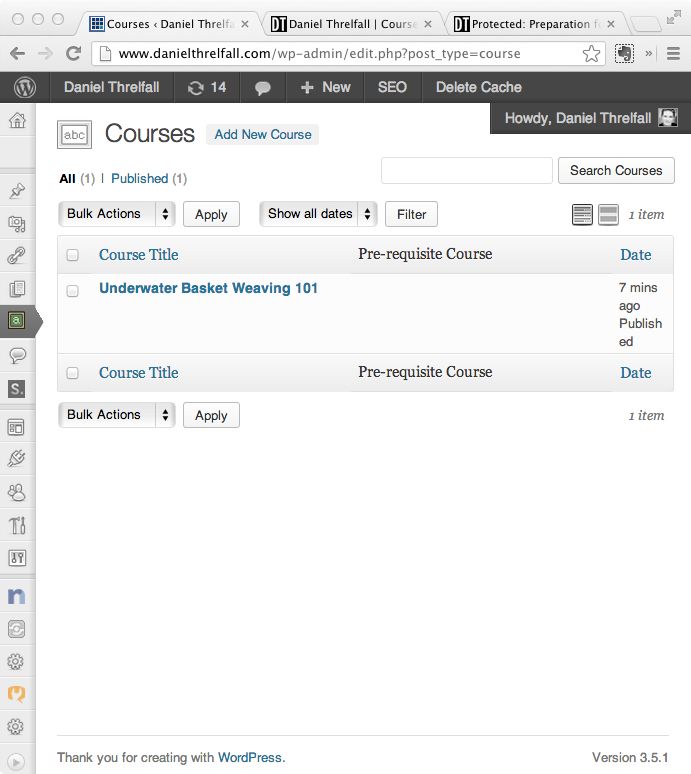
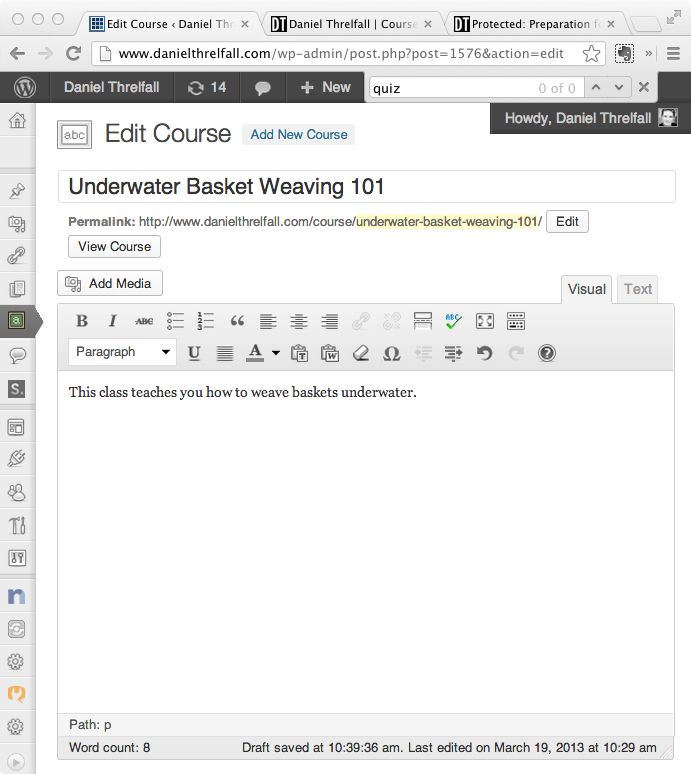
The interface is familiar for those who are used to using WordPress. I created this course when I was in the process of writing up my lesson. The Course Creation was provided as one of the options underneath the lesson creation field. Editing a course takes me to page that looks just like a post or lesson creation.
Analysis
The analysis page provides a course instructor's perspective on all the necessary metrics for courses, grades, and learners. Here are the features you'll see when you click “Analysis.”
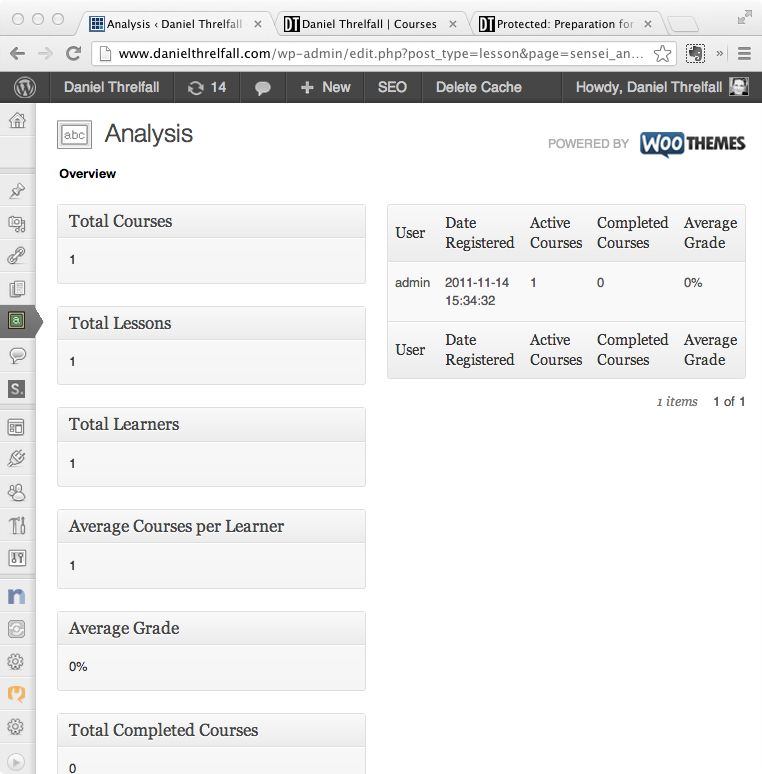
This page provides a survey of numbers only. It is not possible to submit queries or display the data in any other way. Unfortunately, there is no way to manually change student grades.
Settings
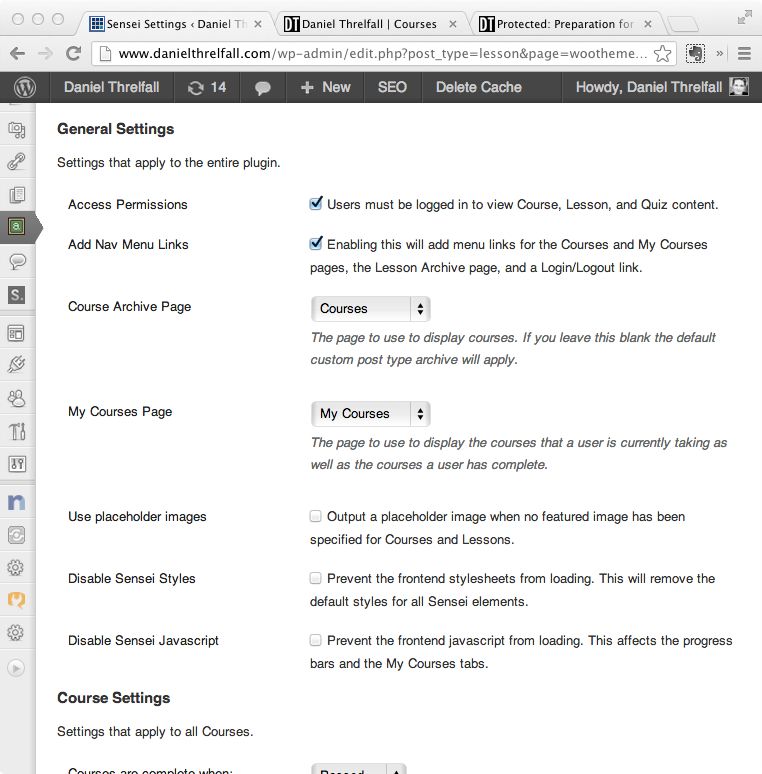
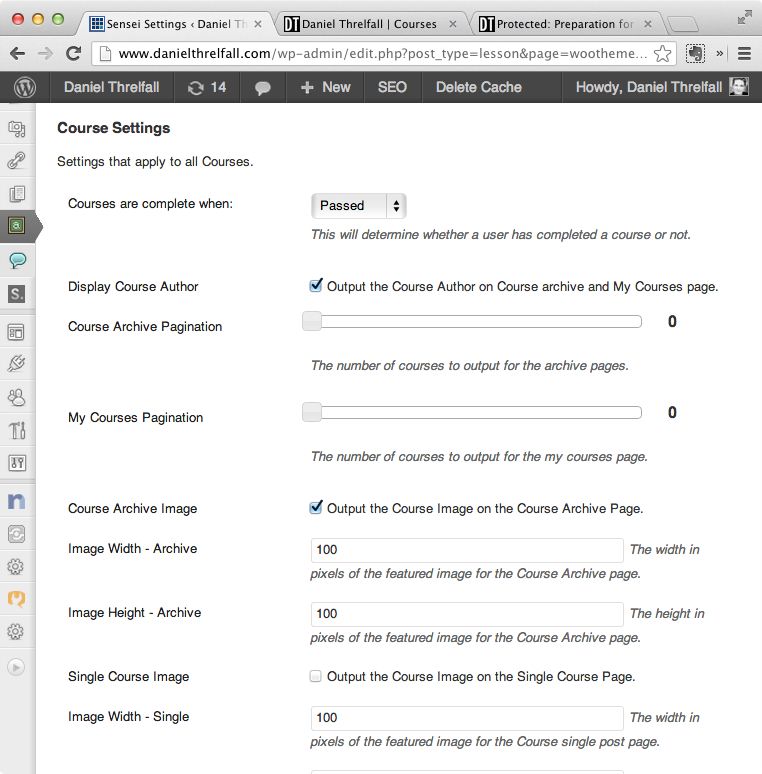
The settings page is a complete way to design courses, lessons, and general settings. There are plenty of options for each. Here is a look:
General Settings
Course Settings
Lesson Settings
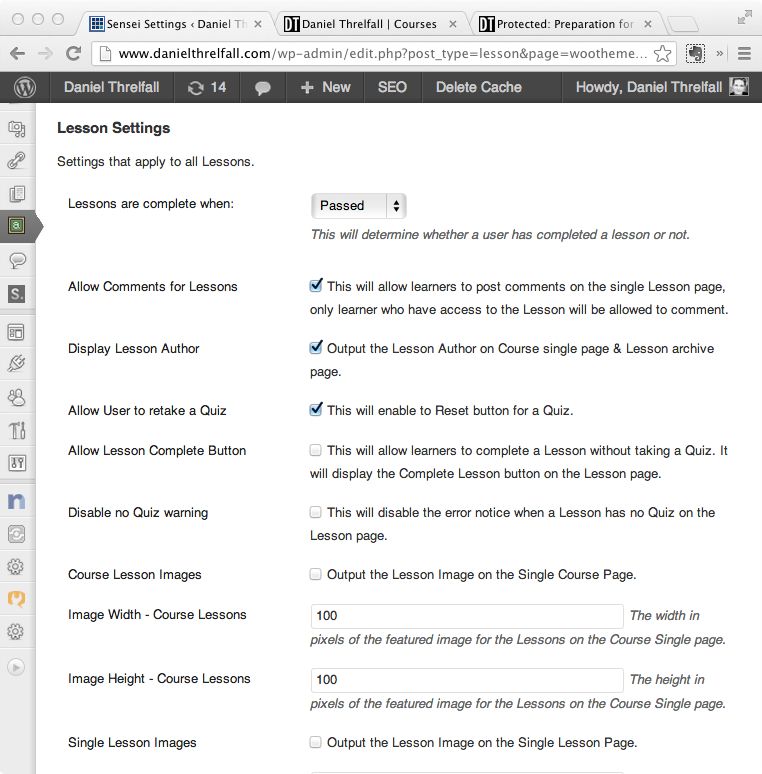
Editing the Sensei settings is a great way to customize the individual lessons and create a virtual school with specific images, appearance, and features.
After becoming familiar with the Sensei interface and features, I figured it was time to give it a go with additional features.
Adding a Quiz
Let's go ahead and create a quiz to test this feature.

After clicking “create a quiz,” I'm prompted to stipulate a pass percentage.

To proceed in creating questions, it is necessary to save the draft lesson. After this, quiz creation can commence.
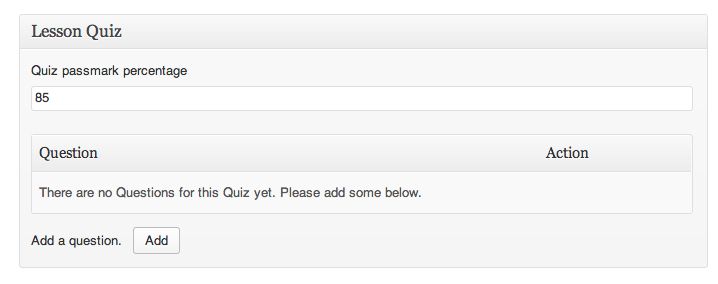
The only questions that you can create are multiple choice questions. The help article states that there will be “the ability in the future to include multiple types of questions such as assessment, essays, etc.”
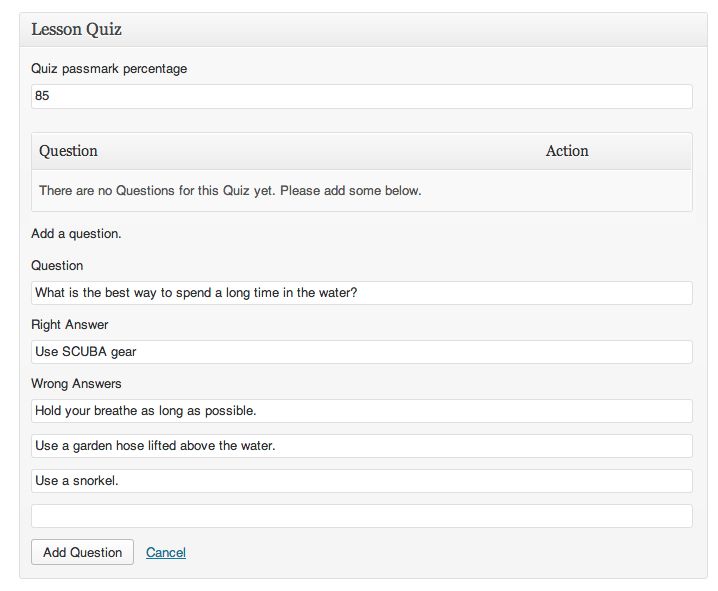
After you create the quiz question, it appears in the “Lesson Quiz” area, with the option to add additional questions.
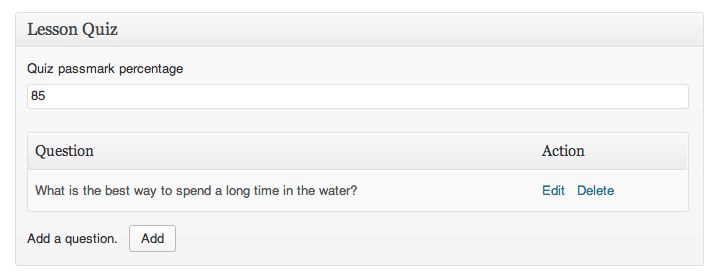
After saving the question, you can go on to create additional questions. I created a total of four, then went to view my lesson.
When I clicked “take quiz” on the lesson page, I was redirected to a new page, still displaying my familiar blog template, and displaying a post with the title of the lesson and “quiz.”
At the time I tested, my quiz did not display. I presume this was due to a conflict with my theme's CSS. WooThemes is available for any WordPress installation but is designed to be fully compatible with Twenty Eleven and Twenty Twelve.
Using Video Courses
Sensei is primed and ready for video instruction. Each lesson provides the opportunity to add a video embed code. Doing so is as easy as using WordPress's oEmbed function and all its supported codes.
Changing the Plugin Appearance
For those who desire to customize the sensei template within their theme, there is a Sensei Theming guide for doing so.
Charging for Courses
Although I did not test this feature, Sensei also integrates with WooCommerce, allowing you to charge for courses. The process, apparently, is as simple as creating your course and then linking it to a product on the commerce plugin.
The Future of Sensei
This plugin is a work in progress, and Sensei makes this clear. There are good things in the offing. Thankfully, they provide a way to vote on future features in the Sensei forums. At the time of writing, there are dozens of suggestions for improvements.
Cost
A single license costs $99. For a five-site license, the cost is $149. For $299, you are allowed to use the plugin on an unlimited number of sites.
Conclusion
While Sensei is not a large and full-featured educational CMS, it does provide an easy-to-use plugin for those conducting small-scale educational courses on a website. It's the perfect solution for selling educational services from a blog or providing employee or subscriber training. It is not, however, designed for large-scale usage by educational institutions.
If you're looking for an easy way to add courses to your blog or website, Sensei is for you. Like anything from WooThemes, it's fun and virtually bug-free. Plus, it's got a bright future.