Just Add Content Review
Just Add Content is reaching a vast market of business owners and entrepreneurs who want websites — nice ones. The easy to use editor is a great asset, especially for those with a limited knowledge of building websites. With a little bit of startup cash and a desire to learn, any business owner can get a thriving online presence in a matter of a few hours. Whether Just Add Content is a good choice for you depends on your needs, your desire to learn, and how you feel about WordPress.
Following is a review of Just Add Content. I'll walk through the login and set up process, then go over the features and functionality of the customized CMS.
Just Add Content's Homepage
The overall design uses a light color scheme. The home page is slightly reminiscent of a parallax design. It is responsive. I checked it out by resizing my browser and by visiting it on my mobile device.
A responsive design is an excellent predictor of the up-to-date nature of a CMS. Overall, my few seconds of simply viewing the homepage leave me with a positive feeling about the CMS.
First, I appreciated the sharp and clean look of the UI. The conversion funnel with its quick and easy site setup takes me about three seconds. Moving as many hurdles as possible to creating a site is the sign of both of a slick sales process, and a smart CMS interface to come
Clearly, however, this is not a CMS built for the tech head. It is absolutely accessible to anyone who has a working knowledge of computers and browsing the Internet. The entire site is singing “simplicity” with remarkable volume.
Selling Points: Easy and Affordable
The homepage features three major headings: 1) easy, 2) affordable, and 3) hassle-free. The discussion under “easy” sells the CMS to “small business owners.” The “Affordable” section includes a price comparison chart. The “Hassle-free” commentary discusses the ease of paying, designing, and using the CMS.
Endorsements
The home page declares that this is a CMS using the “same platform trusted by,” and then displays the logos of Ford, Sony, NFL, eBay, and CNN. This is an excellent shout-out for the remarkable validity of the CMS. (Keep this point in mind; we'll talk about it later.)
Setup and Launch
Immediately after providing my email address, choosing a username, and selecting a password, I am directed to a site setup page and invited to continue the process.
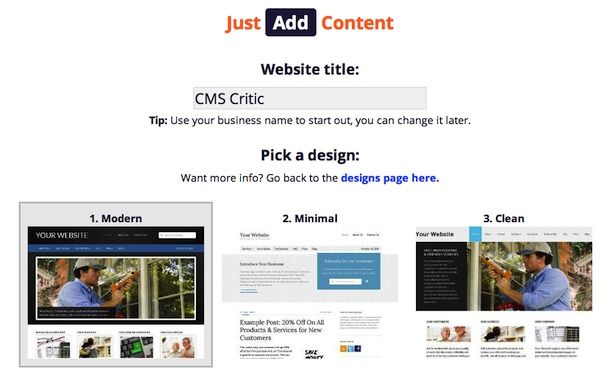
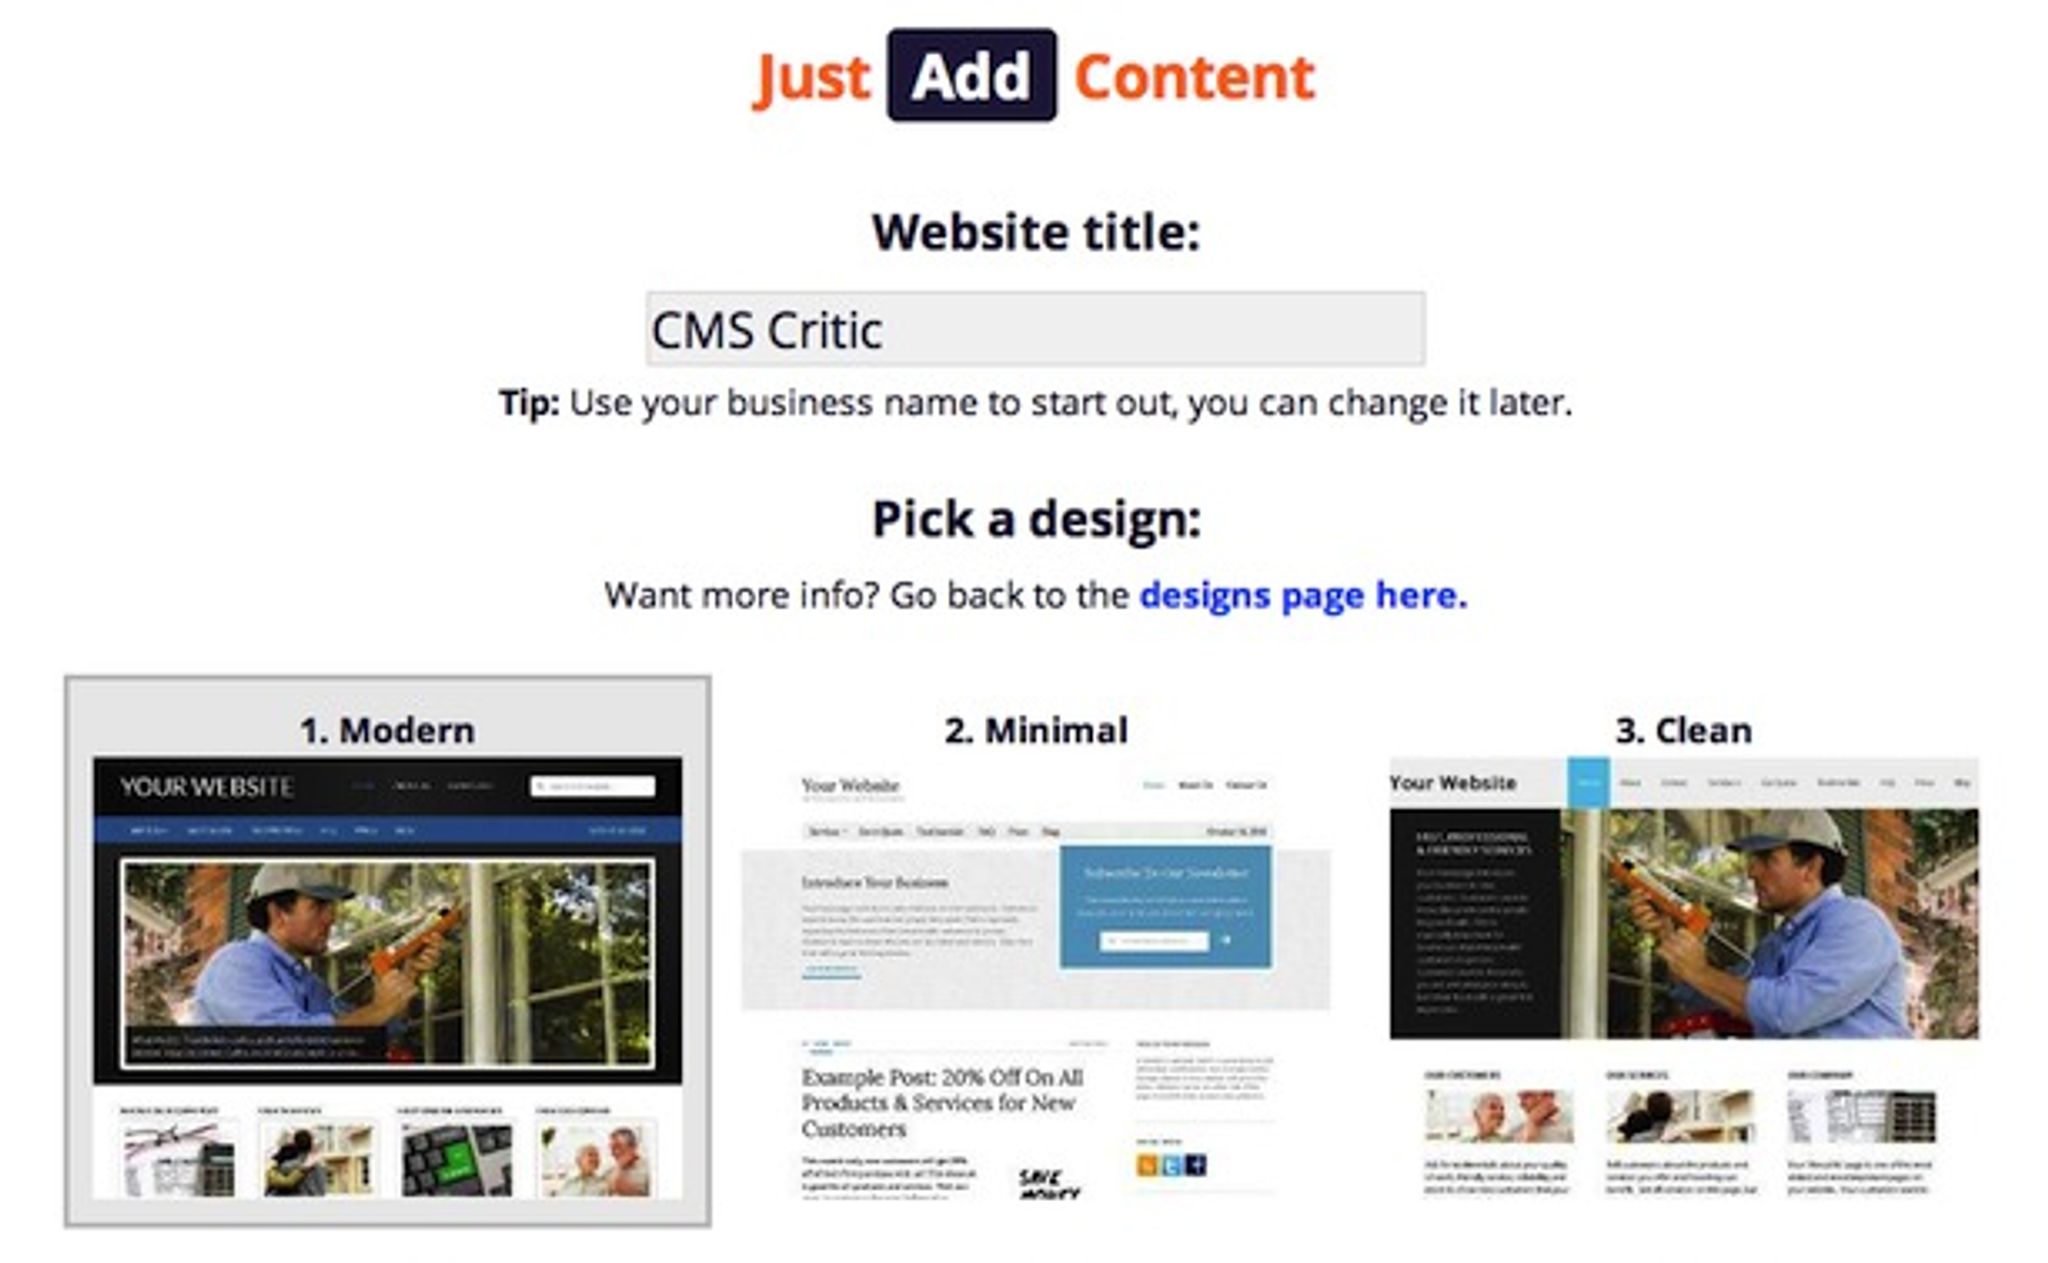
The following page provides me with a few simple details. First, I select a username (cmscritic). The default website address (cmscritic.justaddcontent.com) is automatically generated based on my username to simplify the signup process. I initially am concerned that I won't be able to use a simple .com address, but the system informs me that “If you want to use your own custom domain name, you can add it later.” Then, I select a Website Title. This, presumably, will be my title tag on the new website. The third element on this page is picking a design.
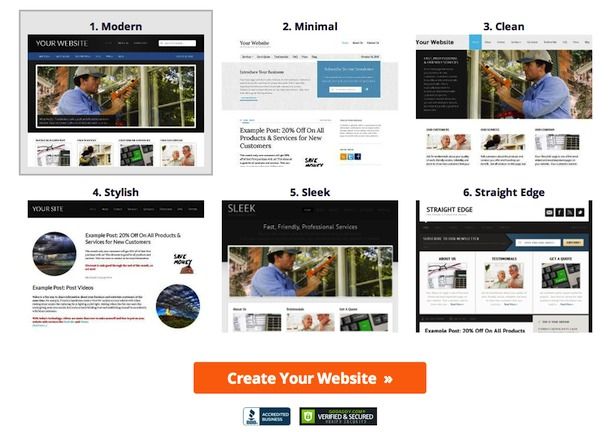
There are only six featured designs. Instead of choosing one of these, I chose to “go back to the design page.” Thankfully, the site opens a new tab instead of losing my spot in the setup process. Although I didn't visit it previously, I'm redirected to a subpage with the same six designs — Modern, Minimal, Clean, Stylish, Sleek, and Straight Edge. Clicking on any of these designs brings me to a detailed explanation of the selected design.
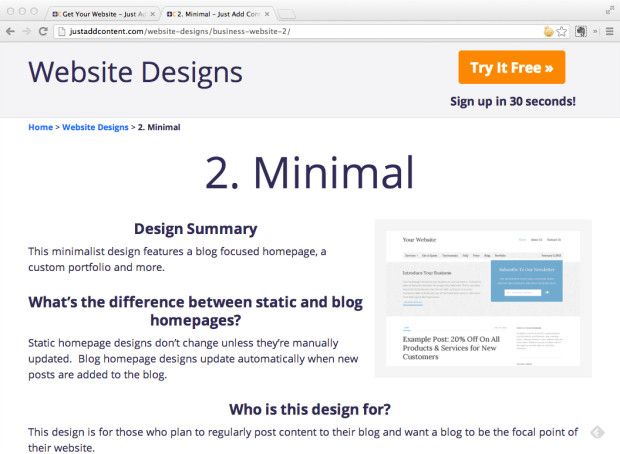
This explanation starts off with a brief summary and a screenshot. Following this intro is a series of questions and answers to help orient me to the best purpose and focus of the website design.
I'm initially disappointed that there aren't more options for designs. When I see this detailed explanation of the how and why of the design, I'm less disappointed. First of all, fewer choices will likely result in more conversion, as demonstrated in the studies of choice paralysis. Second, the designs are smart and effective. I don't feel limited by the strictures of choice. Third, each design is well thought out. I don't get the idea that some designer put up a lot of designs simply to provide users with a lot of choices. Instead, each design has intent and purpose.
Here is an example of the page featuring the “Minimal” design.
I go back to my setup page, and choose the “Modern” design. Then, I click the can't-miss-it orange button at the bottom of the page. The button reads “Create Your Website.”
After logging in, I am presented with voila — WordPress. I wasn't totally surprised. Furthermore, the login page clearly gives it away with its WP URL. The homepage presented this message. These companies have sites, subsites, or blogs that operate on the WordPress platform.
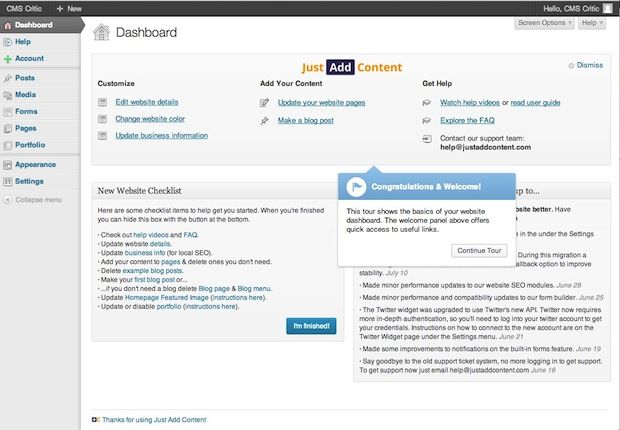
Upon logging into the website for the first time I am presented with a quick tour of the user ‘dashboard’ using the pointers in the image below, the first one being ‘Congratulations & Welcome.’
I am eager to find out about Just Add Content's customizations to the WordPress platform. Instead, of clicking on “help” (we'll discuss that later,) I go to “Account.”
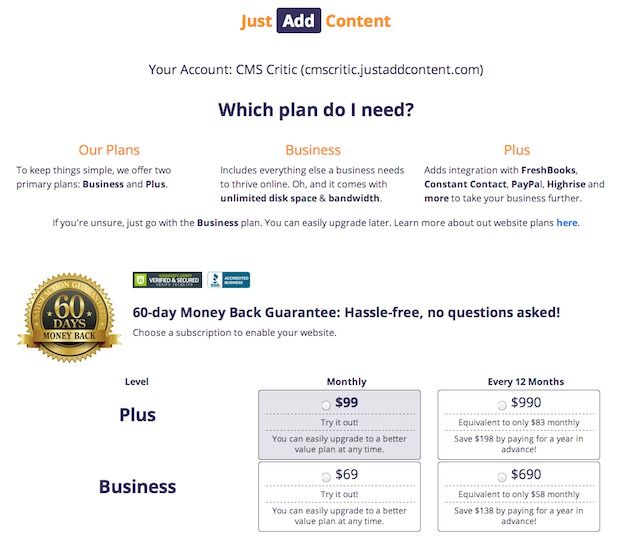
I am invited to upgrade or downgrade my account as well as switch from monthly to annual payments. The different between the Business and Plus plans is explained at the top of the page. The plus plan adds integration with business applications.
To see the additional features, I go back to the dashboard and navigate to “My Account” and view the “Plus Features.” Here is what the non-Plus user is missing.
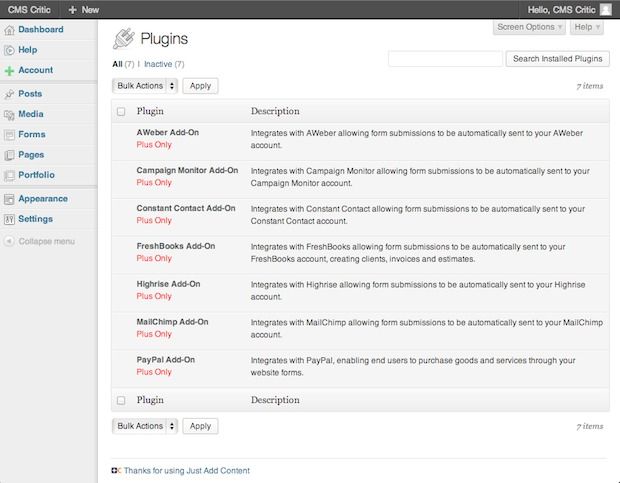
The extra features of the plus account are a series of add-ons that are business app integrations. These include AWeber, Campaign Monitor, FreshBooks, Highrise, MailChimp, and PayPal. Here, I sign up for the business account in order to gain the additional functionality provided by the plugins. Now we'll dive into a more detailed explanation of the CMS itself.
Dashboard
Much of the material covered below discusses features that are familiar to WordPress users. Nonetheless, the business customizations of Just Add Content make it different enough to merit mention.
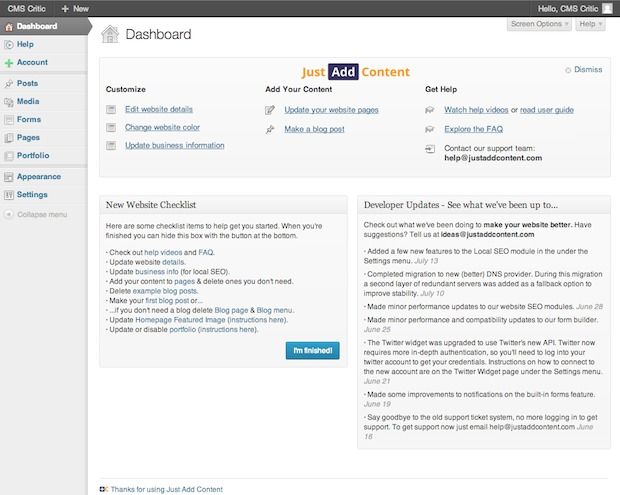
Below is an overview of the default content displayed on the Dashboard screen. This is the screen that appears when you log in to your website. The large welcome panel at the top of the dashboard has various quick links to different areas of my website. The links include ways to customize my website, add new content, and get help if I need it. The dashboard screen, provided one-click from anywhere in the CMS, is a convenient and helpful place for this information.
Help
As discussed earlier, there are a variety of options for getting help. These are all available at the dashboard. We'll go through each one of them to discuss their various merits and advantages.
As mentioned above, the welcome panel is a quick way to change site settings, add new content, and get help.

Getting started
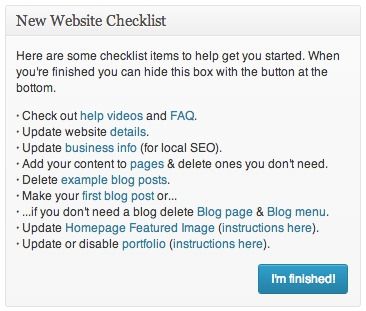
Under the welcome panel on the left is a ‘New Website Checklist’ that guides me through the first steps in getting started with my new website. Items on this checklist include checking out the help videos and FAQ, adding business info for local SEO, and adding content.
Just Add Content Updates
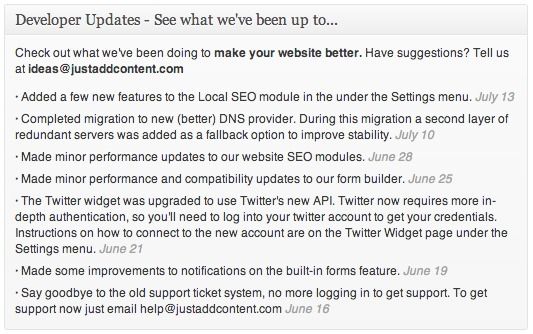
Under the welcome panel on the right is a ‘Developer Updates’ section that tells me the latest updates made to the Just Add Content platform.
Help Tabs
Just about every page in the website management area has a ‘Help Tab’ with help links and contextual help related to the page I’m on. Here is the dashboard help tab:

As an example of how the help tab has contextual help, here’s what the help tab looks like on the Posts page:

Video Tutorials
There are 34 video tutorials. They cover the following topics:
- Dashboard
- Admin Bar
- Toolbar
- Past from Word
- Add a Heading
- Add a Paragraph
- Edit Text
- Hyperlinks
- Lists
- Embed Video
- Distraction-Free Writing
- Add Media From Media Library
- Add Image from Computer
- Add Image from URL
- Delete Images
- Edit Images
- Image Editor
- Rotate and Flip Images
- Crop and Scale Images
- Featured Image
- Add New Page
- Trash a Page
- Restore a Page
- Media Library
- Add Media
- Add New Post
- Trash a Post
- Restore a Post
- Categories
- Change Your Password
- Widgets
- Add a Page to a Menu
- Moving Menu Items
- Add Custom Links
Clicking a video play button opens a pop-up. Videos display in large format, which means longer load times. Each video is just a minute or two long, which is a comfortable length. The tutorial videos consist only of screenshots and narration.
Written Tutorials
The written tutorial option is also a popup menu, which provides a complete and interactive guide to every aspect of the new site. This is a helpful resource, complete with screenshots, related topics, and easy navigation in the left menu.
FAQ section
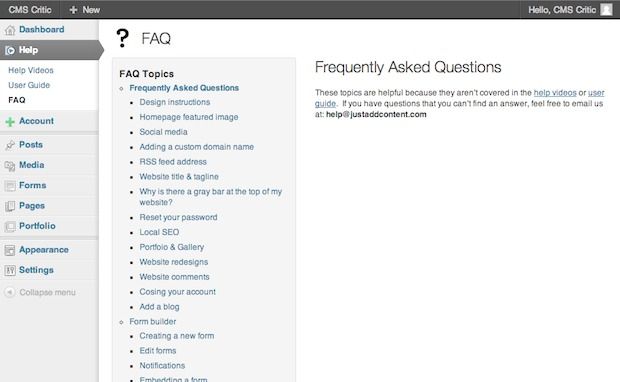
The FAQ section includes additional information and help topics that aren’t included in the help videos and written manual. Some of the items in the FAQ are how to use a custom domain (yourcompany.com), using the form builder, and more.
Account
The “Account” menu has three options — Account, Plus Features, and Delete Website.
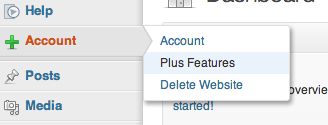
Account: Clicking “Account” brings up the following screen:

This page provides me an opportunity to view and change my plan or payment details. There are a few drawbacks that are apparent to me as I land on this screen. I am taken to a screen that has a completely different look and appearance than the CMS itself. This is clearly a conversion page. I sense a harsh disjunction between the environments of the preceding page.
The new page is not opened in a new tab. I would have appreciated a pop-up or a new tab to view this page. As it is, I have to go back in order to return to the CMS. I click the back button on my browser to return to the CMS.
Plus Features
Navigating to the ‘Plus Features’ page brings up a list of the plugins that the premium service has provided me with. There are seven add-ons.
- AWeber Add-on – Integrates with AWeber allowing form submissions to be automatically sent to your AWeber account
- Campaign Monitor Add-On – Integrates with Campaign Monitor allowing form submissions to be automatically sent to your Campaign Monitor account
- Constant Contact Add-On – Integrates with Constant Contact allowing form submissions to be automatically sent to your Constant Contact account.
- FreshBooks Add-On – Integrates with FreshBooks allowing form submissions to be automatically sent to your FreshBooks account, creating clients, invoices and estimates
- Highrise Add-On – Integrates with Highrise allowing form submissions to be automatically sent to your Highrise account
- MailChimp Add-On – Integrates with MailChimp allowing form submissions to be automatically sent to your MailChimp account
- PayPal Add-On – Integrates with PayPal, enabling end users to purchase goods and services.
Each of these features can be activated with a click. Additionally, there is a “plus only” text link with each one. Clicking “plus only” brings up the account page. Clicking “activate” turns on the plugin.
Placing all the site's add-ons under “site features” seems a bit counterintuitive. Those who are accustomed to using WordPress plugins will not see the familiar plugin menu in the left navigation bar.
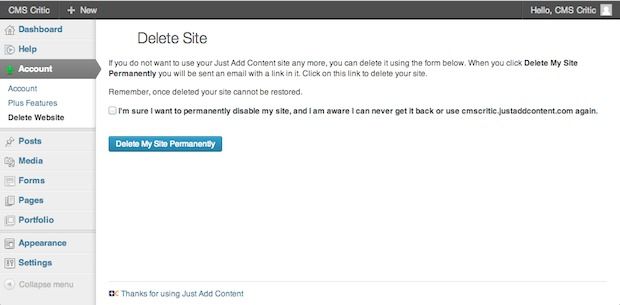
Delete Site
Deleting a site requires checking the confirmation box and clicking the ‘delete my site’ button. After clicking the button, an email is sent with a link to complete the site deletion process.
Posts
‘Posts’ is where the real action of site creation happens. Here, you can view all posts, add new posts, and edit post categories.
All Posts
Provided for me are three example posts pre-loaded. Each post is categorized in one of the default categories.
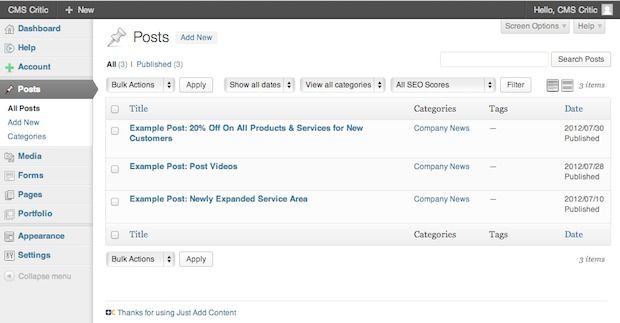
The posts section contains sorting options, including:
- Show all dates, or show specific months.
- View all categories, or view specific categories.
- View by status, including published, pending, or draft.
Also available is a search field for finding posts with specific content.
Add New
Adding a new post brings up the following editor.
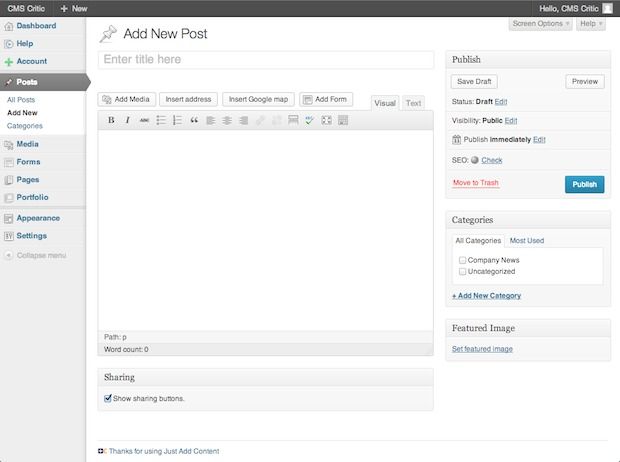
Adding a post is very easy, and is as simple as clicking “publish” after writing the post. As I'm designing my site, however, I do not know where and how this will appear in the overall site structure. Is this a blog? Is it going to appear as a separate navigation page? Unless one is already familiar with WordPress or has read any help articles, this is not immediately apparent.
Categories
The category customization page provides a perspective of existing categories, and the ability to add new ones.
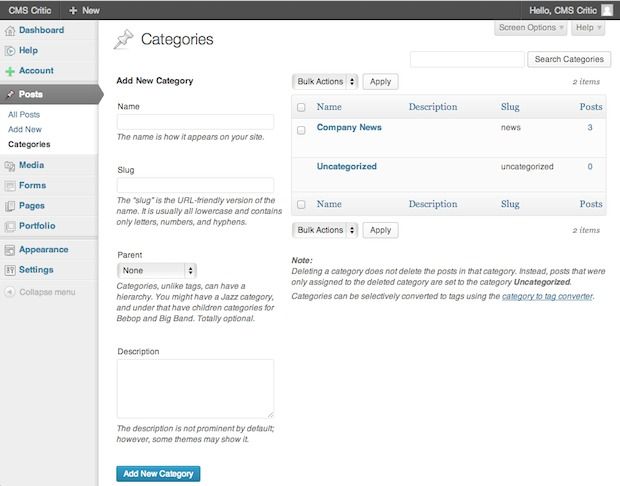
Included in category creation are name, slug, parent, and description. Whereas some CMSs make category creation and menu customization a major headache, this is a simple and straightforward way to do so. The quick view of all categories is a helpful way to see what has been created. There is also an option to “search categories.”
Media
The media tab provides two potential destinations — the “Media Library” and “Add New.”
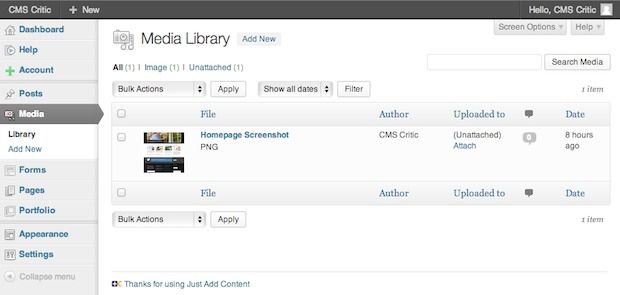
Media Library
Media library is a convenient place to add images and sort or view them according to date added, or perform a free-form search of titles. The only actions that can be performed on images is editing, deleting, and viewing.
The editing features are limited: crop, rotate counter, rotate clockwise, flip vertically, flip horizontally, undo, and redo.

The CMS is not a photo editing software, of course. More appropriately, it is possible to add a caption, alt text, and description.
Add New
Adding a file is a simple drag-and-drop action or a select file.
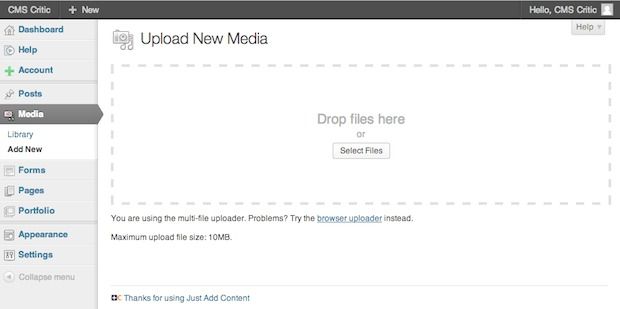
As the file loads, a bar displays the progress of the upload.
Forms
Built in to the CMS is a robust form editor. Clicking the top “Forms” menu brings up an overview of all the forms. From this page, it is possible to view forms that have been created, see how many times they have been viewed, entered, and completed. Each form has a unique numerical ID.
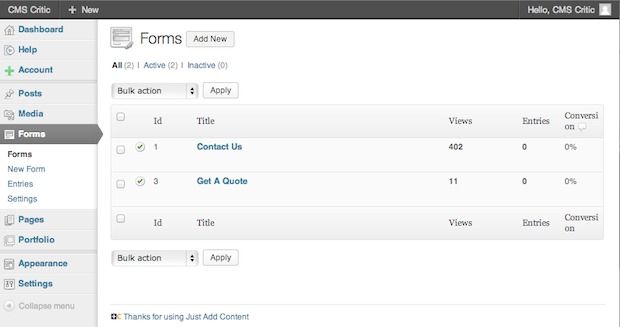
From this menu, one can edit the form, change its settings, view entries, preview the form, duplicate it, or delete it altogether.
Adding a new form is a straightforward process. After creating a form title and description, you enter the form editor. For those not familiar with creating forms, there is a helpful tutorial form.
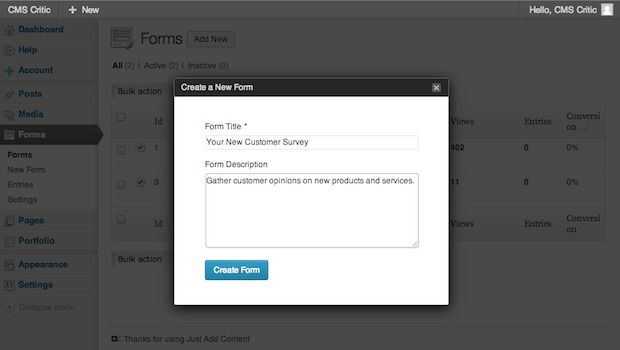
If Just Add Content has a strong point, it is forms. The form creator is a powerful tool, giving the user the ability to make forms of any kind, with as many options and customizations as they want. Here are some of the options:
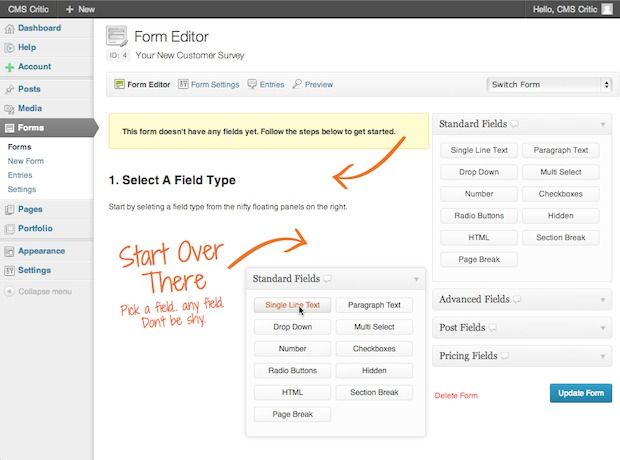
Standard Fields: single-line text, paragraph text, drop down, multi select, number, checkboxes, radio buttons, hidden, HTML, section break, and page break.
- Advanced Fields: Name, Date, Time, Phone, Address, Website, Email, File Upload, CAPTCHA, List
- Post Fields: Title, Body, Excerpt, Tags, Category, Image, Custom Field
- Pricing Fields: Product, Quantity, Option, Shipping, Total
The content forms are customizable, and it's easy to use them for commerce purposes.
From the Form Editor page, you can also edit the form settings. This brings up an additional set of customizations.
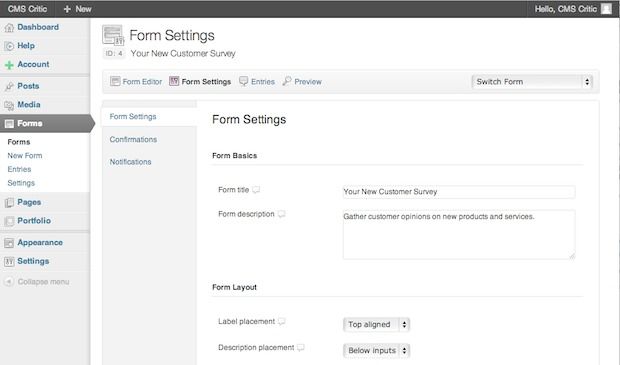
These customizations allow you to do the following:
- Edit the form title
- Edit the form description
- Adjust the placement of the form's label
- Adjust the placement or layout of the form's description
- Change the CSS class for the form
- Change the button type from text to image, and alter the image.
- Create conditional logic for the button
- Set restrictions on the entries.
- Set a schedule for the form.
- Require login for form entry
- Employ anti-spam honeypot on the form
- Enable animated transitions on the form
- Alter the confirmation text for form completion
- Set notification texts for form completion
AWeber Feeds
If a user has AWeber, they can integrate this as well.

In addition to AWeber, if enabled there will also be settings for the other add-ons like FreshBooks, Highrise, MailChimp, Constant Contact, PayPal, and more.
Pages
From the pages menu, you can create pages, edit pages, and delete pages. This is where the major act of creating a website really happens. The site comes customized with an array of pages already. Here are the pages that are created for you:
- About Us
- Blog
- Contact Us
- Frequently Asked Questions
- Give Customers Online Cost Estimates
- Press Coverage, Awards & Other News
- Privacy Policy
- Services. This page has subpages listing all of the potential services of a company.
- Sitemap
- Testimonials
This is a pretty comprehensive list, meaning that if you're creating a new website, you probably won't have to go through too much work of creating many custom pages from scratch. Of course, each of these pages can be edited, deleted, or customized.
Let's take a look at one of them. Clicking on the page title brings up the editor.
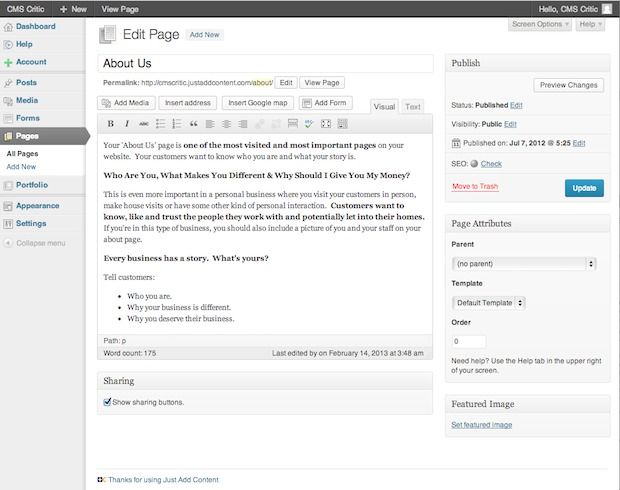
The editor looks familiar, because it's the same one that is used for adding new posts. The text that is entered on this page gives some tips on creating a successful “about us” page.
You can add media, add a form, and view or edit the page.

Here's what the page looks like when viewed:
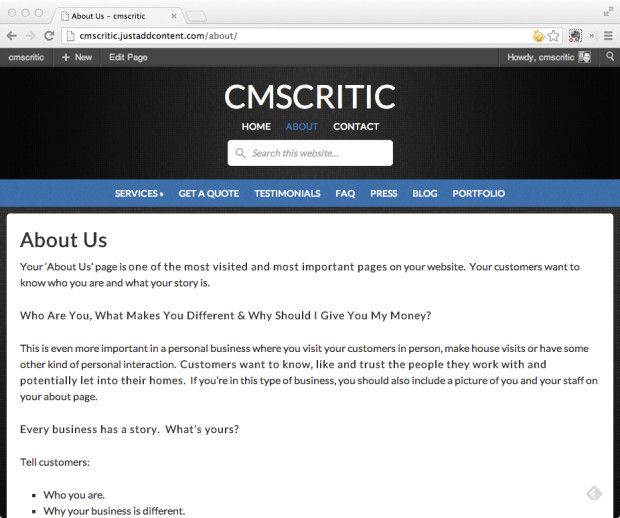
In order to adjust other features of the page, you can change the parent menu, assign a template, and adjust the menu order.
The above view also shows off the responsiveness of the website design. On smaller screens, the main menu automatically moves from the top right portion of the web page to the center of the web page under the title, which is also automatically adjusted. This responsiveness makes my website effortlessly adjust for better viewing on mobile devices like tablets and smartphones.
Portfolio
The portfolio menu is a way to create custom pages that showcase a company's work. There are demos provided to see how these work. Here's how the portfolio appears on the site:
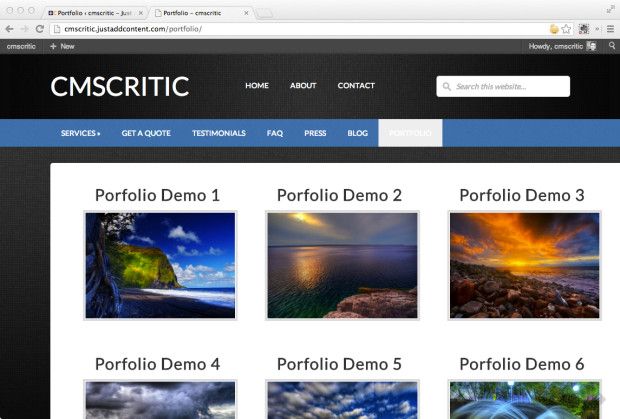
Portfolios can be deleted and/or customized from this menu. Adding a new portfolio brings up the typical editor page.
Appearance
Design
It's easy to make some sweeping design changes with a few clicks. Although it is not possible to make customized alterations to the overall site design, you can change the color to blue, orange, or red, and choose a different default layout for the site.

Widgets
For those who are familiar with widgets and how they work, this is the page for making changes. Available widgets are as follows:
Widget Options
- Custom Menu
- Form
- Subscription form
- Featured page and thumbnails
- Latest tweets
- Slideshow
- User profile from Gravatar
- Overview of site pages
- Recent post listing
- Search form
- Social profile icons
- Arbitrary text or HTML
- Business Address
- Google Map
In order to use these widgets on the site, you can drag them to one of the menus on the site.
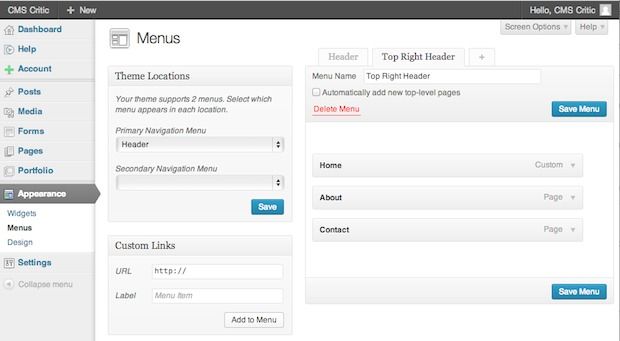
Menus
The menus page allows for editing and customization of the site's menu. Most business will want to change the default menus that come with the website.
Settings
The settings is the nuts and bolts stuff of your website.
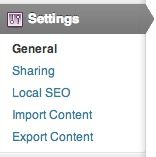
General
The general menu allows you to change your site title, add a tagline, change your admin email, set your time zone, and customize date and time format.
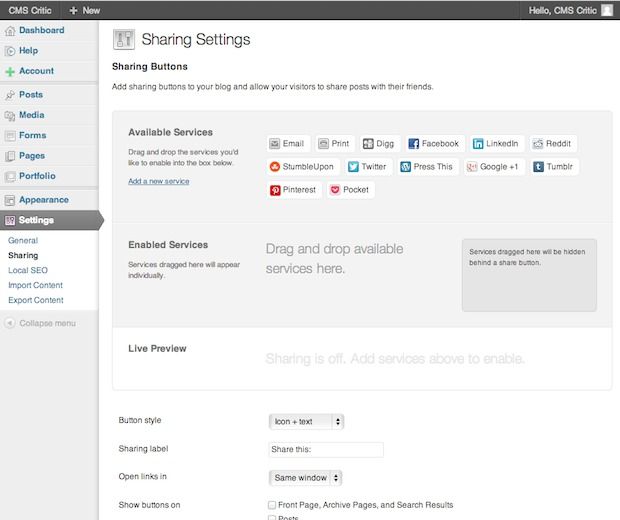
Sharing
The menu for sharing allows you to add social buttons to the site.
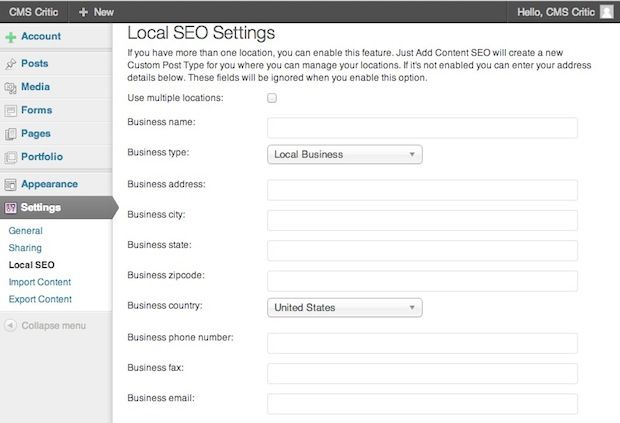
Local SEO
Here is where you all of your business information like location, business type, contact information and more. When you add this information it is automatically added to your listings in search engines like Google, relevant widgets, and other parts of your website to help local customers find you. If your business has more than one location, you can add that here also.
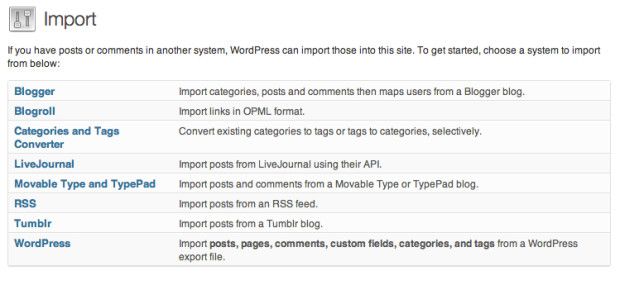
Import
Just Add Content makes it easy, using the WordPress platform of course, to migrate a site's content from any of the following: Blogger, Blogroll, LiveJournal, Movable Type, TypePad, Tumblr, or another WordPress site. This is an outstanding feature, especially for a site that is making the switch to Just Add Content from a simpler platform.
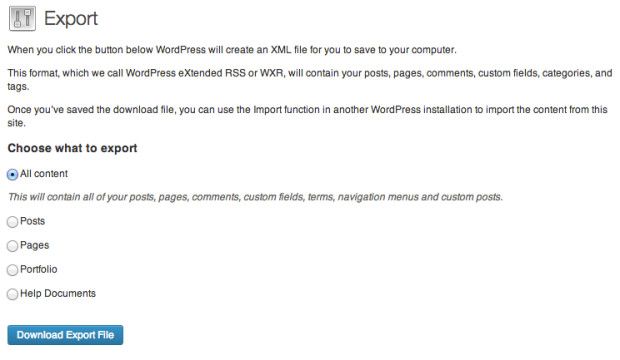
And, just in case Just Add Content doesn't work for your business, you can easily export your content to another site. That's the beauty of WordPress.
Summary
Just Add Content is a strong contender for easily creating a custom website for your business. It uses the web's most-used CMS — WordPress. It provides a custom design that a business can easily adapt and use.
Pros
- Easy setup process. It's a breeze to get started on the site.
- WordPress platform. This is a stable and trusted platform.
- Comprehensive and easy help. The videos are helpful, and the table of contents for the help menu is comprehensive and easy to use.
- Forms. The forms functionality is the strongest I've seen.
- Advanced things like local SEO are done automatically.
Cons
-
- Limited WordPress functionality. Although sites are built on the WordPress platform, you are not afforded the full-fledged functionality of a WordPress site. For example, you can't add your own plugins. Using a Just Add Content is not worth the extra monthly cost for someone who already knows how to use WordPress and wants the full WordPress power available with no restrictions.
- Inability to fully customize the design of the site with your own design.
- Limited features for power users. Although upgrading to the premium-level service adds a few add-ons, there is nowhere near the power and customization that advanced users want. This is service designed for someone who wants a simple, no-hassle website.
Bottom Line
Just Add Content offers a safe and comfortable service for small business owners looking to have a great-looking web presence, including accepting online payments and plenty of options.
Just Add Content is not a good option for people who are already familiar with WordPress. WordPress users are often familiar with installing a custom theme, adding plugins, and customizing the site. This is what Just Add Content does for you. The limited functionality provides good guardrails for the web newbie, but adds limitations and costs for those who already know and love WordPress and don’t mind doing the work themselves.