ProcessWire Review - Simplicity Meets Performance
Those who know me know I am a huge fan of simplicity and minimalism and when these two traits can be found in a CMS, well, you pretty much have my interest piqued. Simplicity and minimalism doesn't mean a lack of functionality, however, and in the case of ProcessWire, it means a whole lot of features packed into a no-nonsense CMS without the fluff. And that means, Mikey likes it (for those old enough to remember this commercial, you'll get the joke there.)
Before I get into the review, I recommend you watch this video which gives a great overview of ProcessWire and helps you get an understanding of the product before reading below.
Here is a great explanation as to what ProcessWire hopes to achieve as well and it's a good read for those considering this CMS.
For this review, I'm using the Blog Profile that Ryan Cramer (ProcessWire's founder) has put together for those who are interested in using this CMS for their blogs or who wish to incorporate a blog into their existing ProcessWire sites.
What I personally find amazing about this blog profile is the fact that Ryan quite literally started this June 8, 2012 and already it is packed with features comparable to some of the more popular blog platforms.
Take a look at this list of features:
- Mobile-friendly (responsive)
- Customizable categories and tags
- Monthly and yearly archives
- Comments may be browsed with posts or on their own
- Author biographies
- Customizable and sortable sidebar widgets
- Recent comments and recent posts widgets
- Can be connected to your Twitter account with the Recent Tweets widget
- RSS feeds for posts by date or category
- RSS feed for recent comments
- Built-in lightbox photo gallery
- Built-in YouTube and Vimeo video embedding–just paste in the video URL!
- Multi-language ready
- Custom search engine for blog posts
- Markup and styles based on the Skeleton boilerplate CSS framework.
- Built around well documented, easy-to-understand and easy-to-modify ProcessWire template files and CSS. This makes it easy for you to use as-is or as a starting point for your own completely custom blog.
Now think about how quickly he managed to build this blog profile using ProcessWire and if that doesn't tell you something about how powerful this system is, I don't know what would.
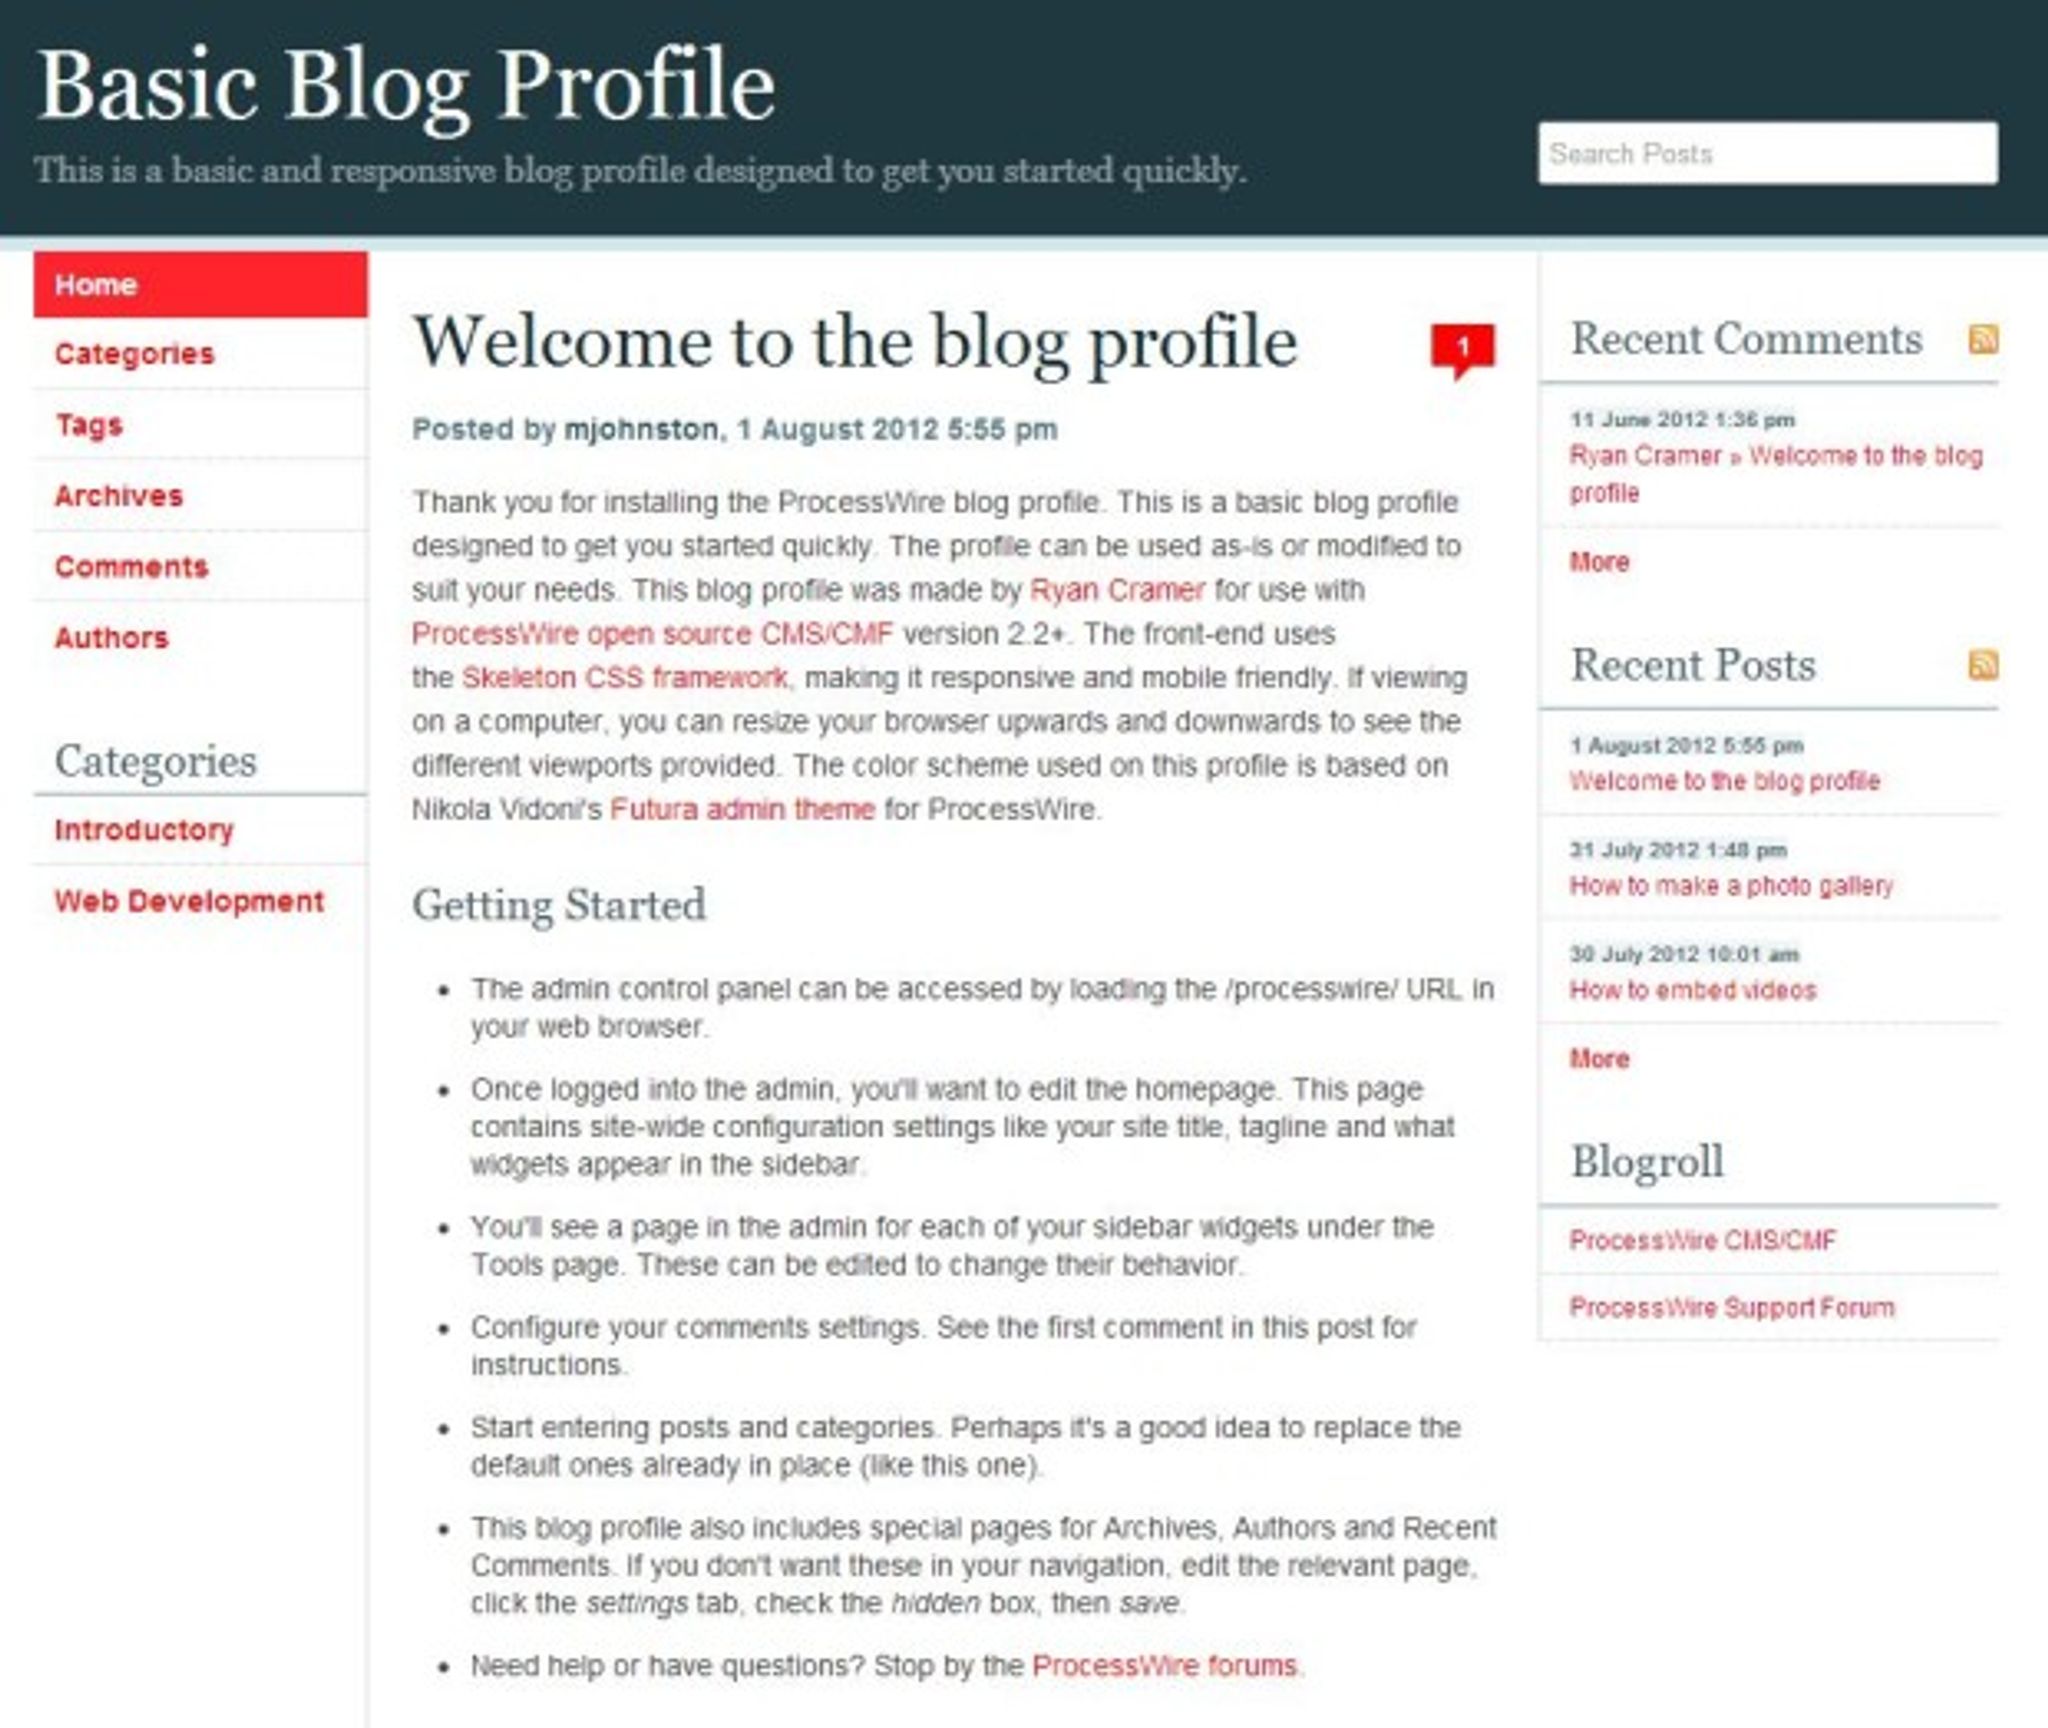
Here's how it looks when you first install it (by the way, the installation is about 5 steps and it's super easy so no need to include screenshots of that process here.)

As you can see, you start with a standard three column template with a menu on the left, nice comment counter beside your title and everything you'd expect from a typical blog (ala WordPress, etc). Ryan has included a number of awesome ways of displaying your posts within the site. You can browse by Categories, Tags, Archives, Comments and Authors. Here's how each of these views looks to the end user.
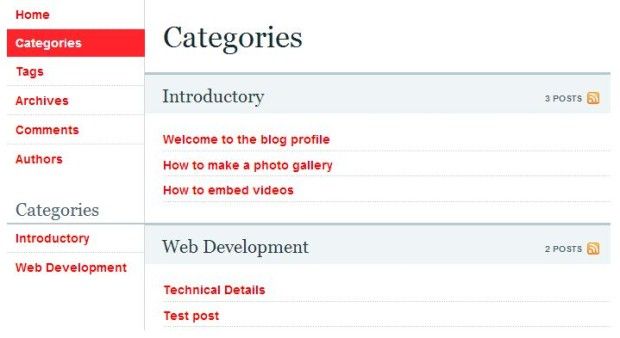
ProcessWire Review – Posts by Category

ProcessWire Review – Posts by Tag

ProcessWire Review – Archives

ProcessWire Review – Posts by Author
You can also view recent comments from the Comments link:

ProcessWire Review – Recent Comments
With each blog post you write, readers are able to leave comments as well, here's how they link at the bottom of a blog post:
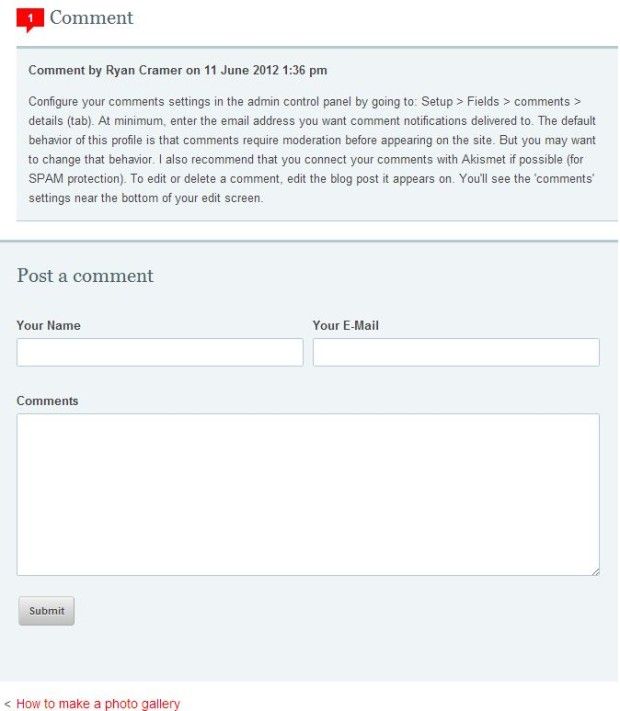
As you can see if you read the comment in the screenshot above, Ryan has thought of pretty much everything and has enabled comment moderation by default, but should you choose to do so, you can disable this. You can also install the Akismet module (powerful spam protection from the makers of WordPress) from within ProcessWire and use it to help trim spam comments.
Perhaps you are interested in writing a post that includes a gallery of pictures? ProcessWire can handle that with ease. Not only does it come loaded with a lightbox effect for your images that pops the picture up over the post but it also nicely organizes the images into a thumbnail gallery for you. As part of the sample content that ProcessWire starts off with, you'll get a nice post that explains how to quickly generate an awesome looking gallery post. Here's how it looks when published:

Here it is again showing the effect that happens when you click on a thumbnail:

That, in a nutshell, is the blog profile for ProcessWire.
Now that you've seen some of what it can produce, you must surely be wondering where all of this magic takes place? Why, in the CMS itself of course! Let's take a look!
Here's how ProcessWire looks when you first log in:
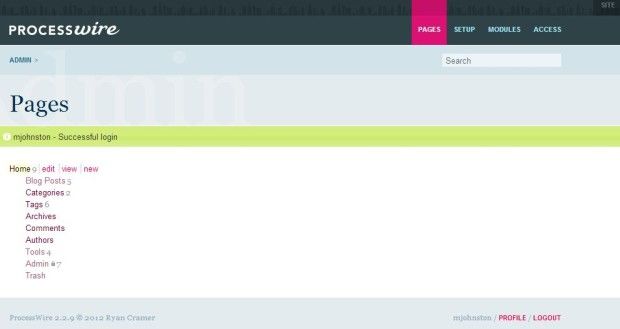
Were you expecting more clutter? You won't find it here.
There you have it, the ProcessWire backend. Where all of the magic happens. On this first page, we've got all of our types of content neatly organized and ready for editing, moving, viewing, etc..
When you are ready to add content you simply click on the type of content you wish to modify, in this case we'll go with Blog Posts and select ‘New'.
Let's do a sample post shall we?
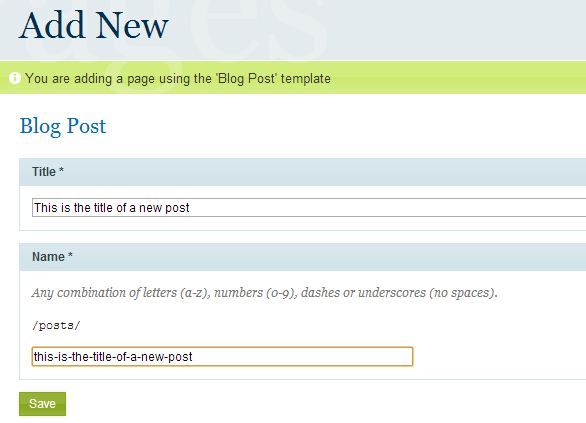
Once you've entered your Title and slug, you'll click save to proceed. You'll then get this page:
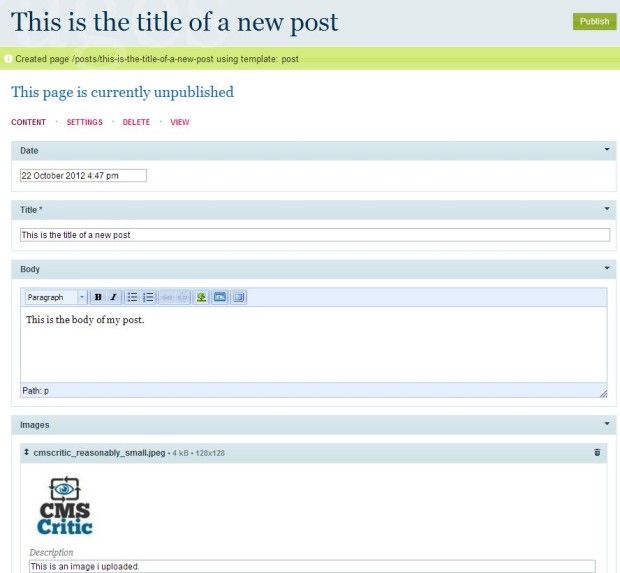
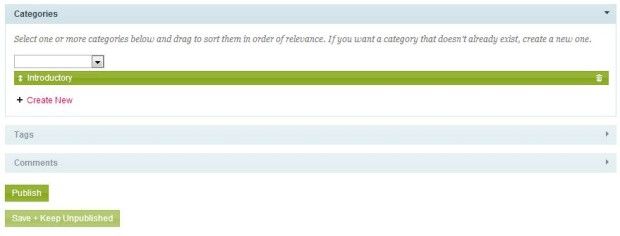
As you can see, I entered some text in the body of my post, uploaded a picture and entered a description for it. Scrolling down, I'd be able select my category, enter any tags I wish and view any comments (including those that might need moderating).
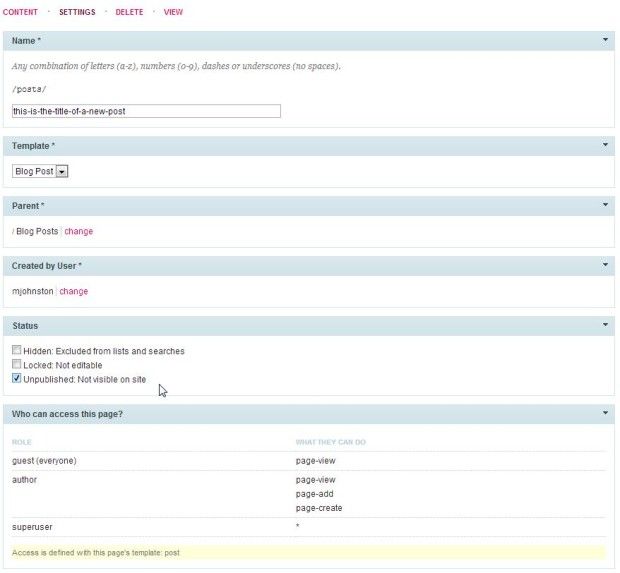
To further modify the post, I can click on the settings link and make the necessary changes.
Once published, here's how it looks within the blog profile on the site:

Now that we've seen how adding content works, it's time to look more at the admin interface so let's take a look at the Setup menu where templates and fields can be created and modified.

Opening the Templates menu, we can see a huge list of all templates within ProcessWire. This is also where you would go to create or modify them.
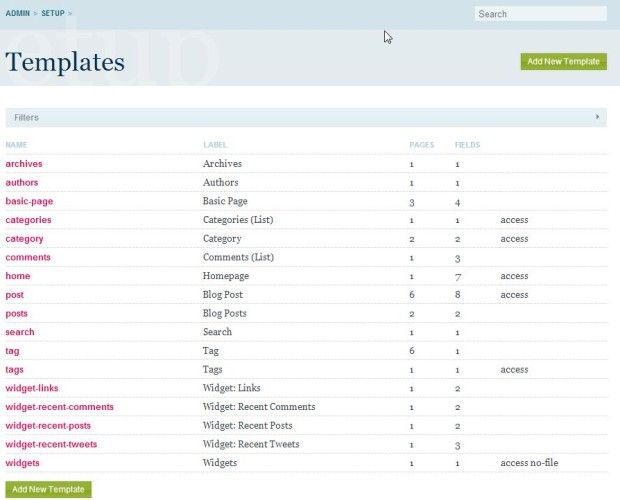
Each template makes use of specific instructions and fields that you choose when creating the template (or modifying an existing one). Within this blog profile for instance, we have the templates above and a list of fields that looks like this:
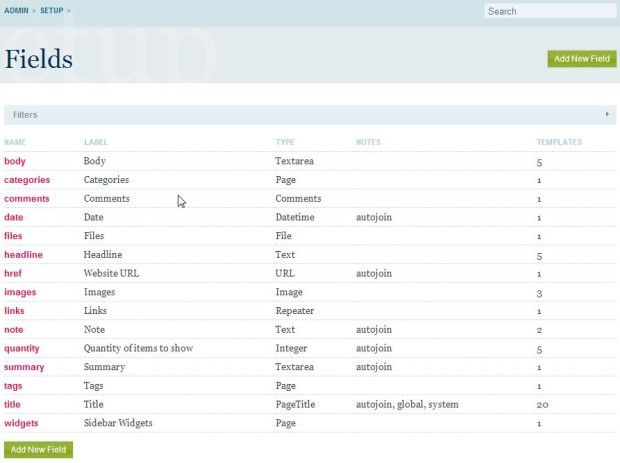
New fields can be added easily and made available within templates. To do so, you would simply click on Add New Field and you'd be presented with a screen like the one below where you would enter the name for the field, select the field type, enter a label and a description.

Once this is complete, you can enter additional details for the field:
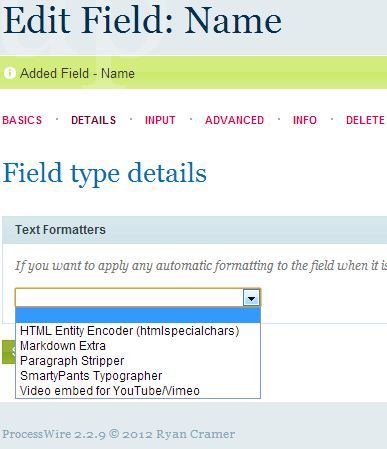
Formatting options
Input Field Settings
Once the field is customized to your liking, you simply go back and choose which template you'd like to add it to your chosen template by editing it.
That's how easy it is to add a new type of content to a template. Quick and simple. Templates can be heavily modifed to your liking and there are tabs for URL settings, access privileges, caching and more.

URL Settings
Output Caching
Perhaps you'd like to add additional functionality to your ProcessWire installation? There are plenty of modules to choose from. Simply navigate to the Modules link at the top of your Processwire admin area and you'll get a list of Modules to choose from. There's also a handy button to check for new modules that you've uploaded since when you first did your install.
To install a module, click the Install button (hopefully that's obvious from the screenshot below):
ProcessWire comes with an advanced permissions system as well. You can control every little detail if you wanted to and be obsessive with your permissions, or you can choose to use the defaults. You can create new permissions, roles and users from within the Access page and you can go as granular as you wish.

That, ladies and gentlemen, is ProcessWire in a nutshell. For those of you who are still not sure if it's the right system for you, be sure to read their about page where there's a good sample of sites running Processwire ( http://processwire.com/about/ ) and check out these videos showcasing some additional functionality within the system or even better, try their demo .
What do I like about ProcessWire?
ProcessWire offers simplicity, power and flexibility in a small package that, with a small learning curve, is quick to pick up and learn. They have an awesome, tight knit community that is quick to offer suggestions and help to those who need it and there are plenty of modules.
They are also in the running in our Critic's Choice CMS Awards so if you like them, go vote!
For those looking for an awesome CMS with a ton of power that's easy on the resources, you'd be remiss not to check out ProcessWire .