Review of Purple Parrot CMS
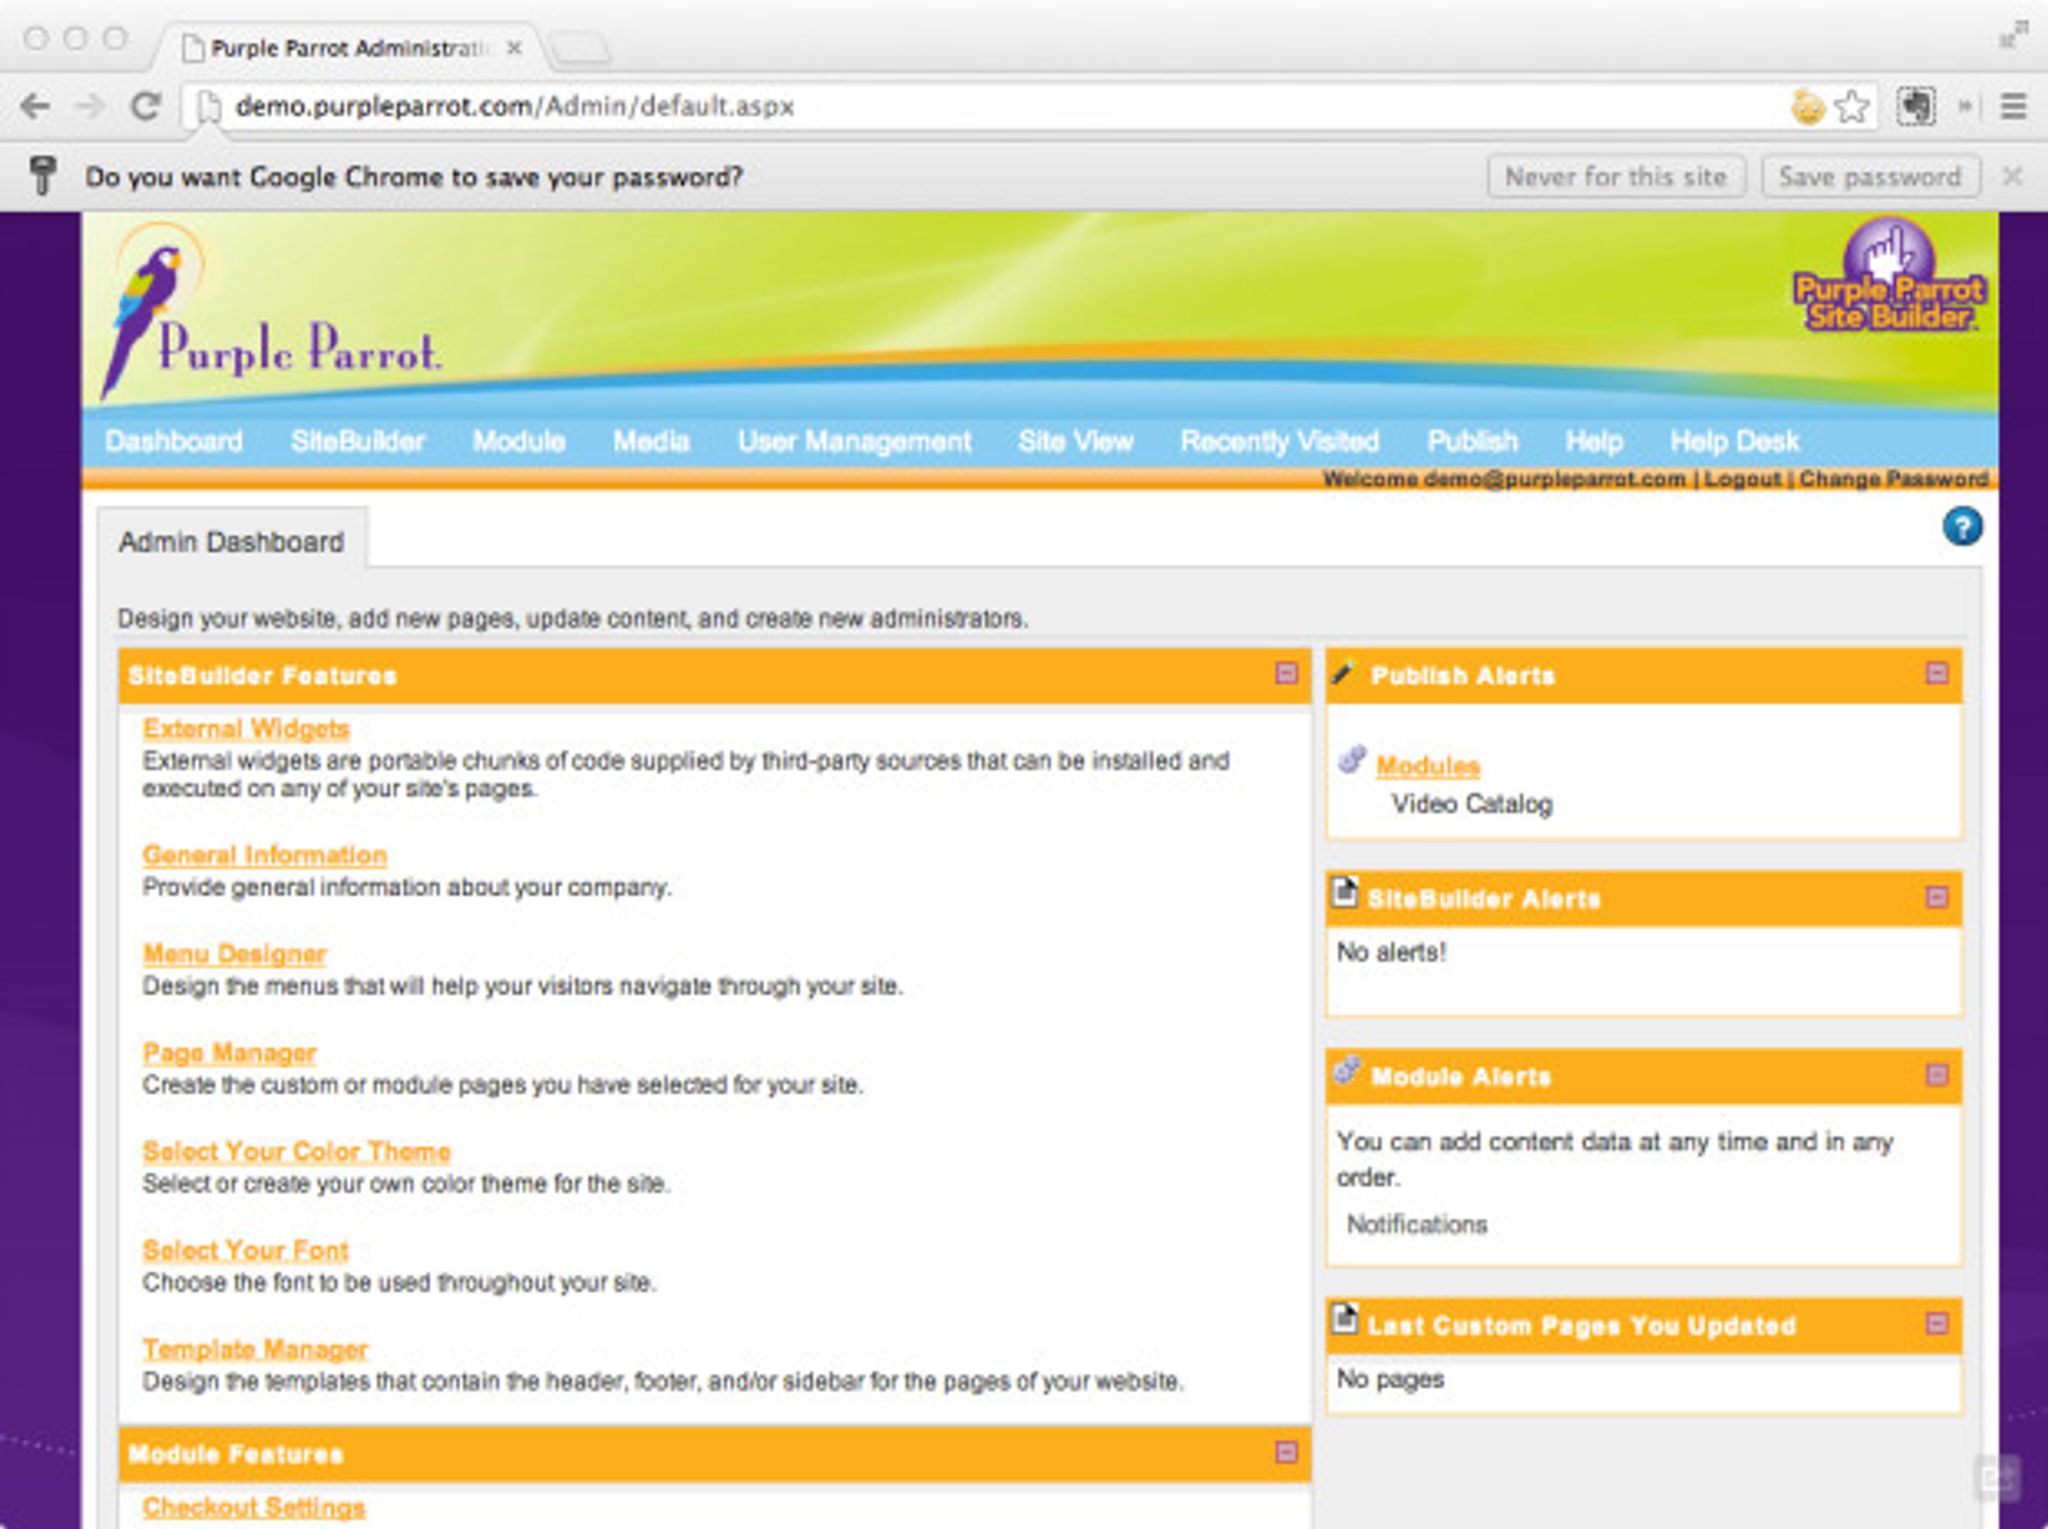
Purple Parrot is a proprietary CMS with plenty of out-of-the-box features for a variety of website needs. Purple Parrot caters to small business, e-commerce, and online education sites. The CMS is cloud-based and multi-user.
Overview
Purple Parrot is a full-fledged CMS, including a web design and software solution firm. Purple Parrot has been in business since the early days of widespread Internet usage (over 20 years). Part of their sell is the ability to take an existing website and place it into their own CMS, giving you the ability to take full control of a website. In spite of having plenty of features, Purple Parrot has some features that users may find limiting, including difficult site design process, lack of access to code, and some unwieldy operations in the CMS.
Creating a Site
I'll walk through the process of creating a site on Purple Parrot.
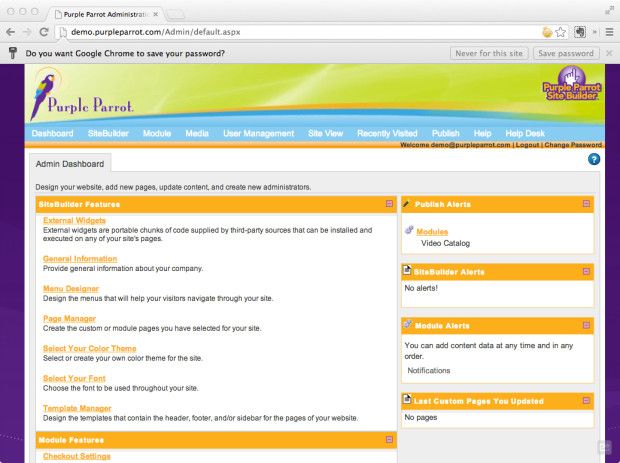
When I log in for the first time, the Admin Dashboard is a bit bewildering. Here's what I see.
SiteBuilder
The most prominent category is “SiteBuilder Features.” Within this category are the following features, including a brief onscreen description.
- External Widgets – External widgets are portable chunks of code supplied by third-party sources that can be installed and executed on any of your site's pages.
- General Information – Provide general information about your company.
- Menu Designer – Design the menus that will help your visitors navigate through your site.
- Page Manager – Create the custom or module pages you have selected for your site.
- Select Your Color Theme – Select or create your own color theme for the site.
- Select Your Font – Choose the font to be used throughout your site.
- Template Manager – Design the templates that contain the header, footer, and/or sidebar for the pages of your website.
I found the descriptions of each feature to be helpful, but was nonplussed as to which I should choose to start my site.
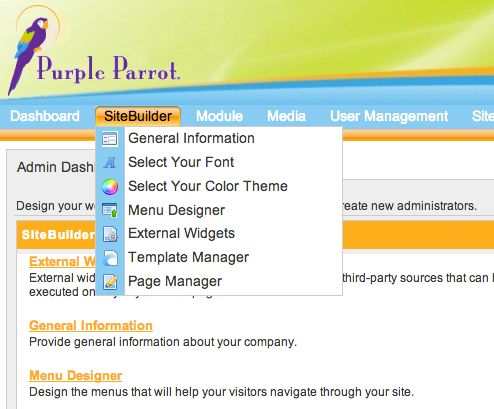
The dashboard links are replicated in the menu bar. So, instead of clicking one of these dashboard links, I chose the “SiteBuilder” menu link, and chose “General Information.”
General Information
On this screen, I edit my site's general information, including the company name, a description, and a login option.
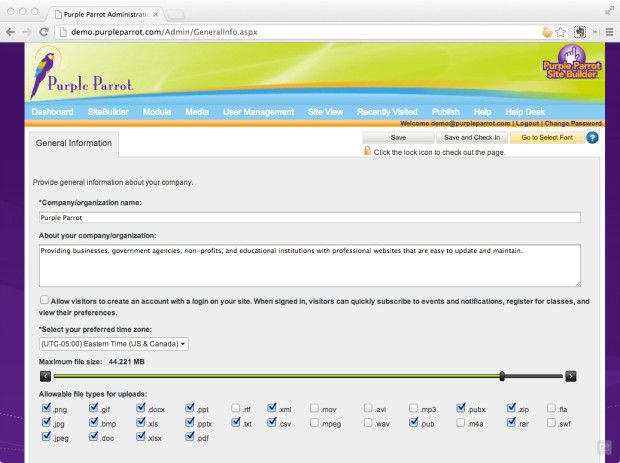
The customization options at the bottom are denoted with green checkmarks. When I attempt to “select site width,” I receive the following information:
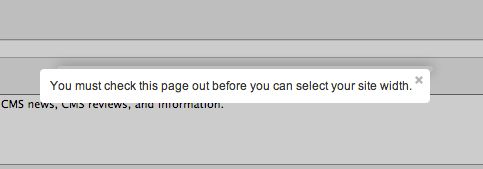
To “check the page out,” I go to the top of the page, where I see the following:

Clicking the lock image then “checks out” the page, where I can complete further operations.
Site Width
There are two options for site width:
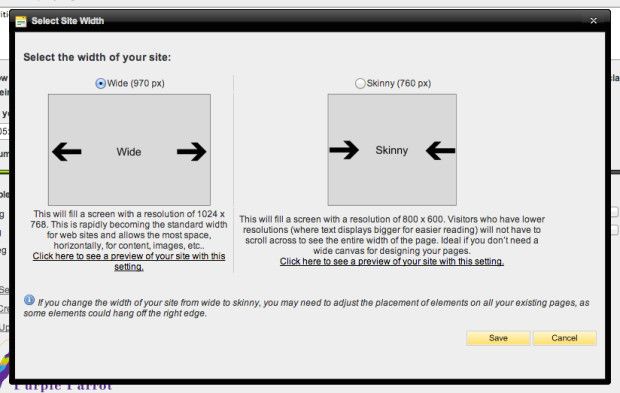
These two options are standard. I do notice, however, there is little flexibility to change these options, nor is there a responsive design option. The customization is limited, which is acceptable for someone with limited web experience.
Metadata
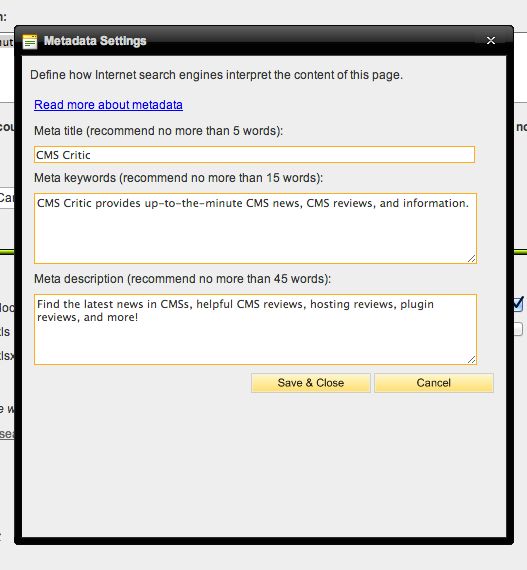
There is an area to edit the metadata, which is helpful for SEO purposes.
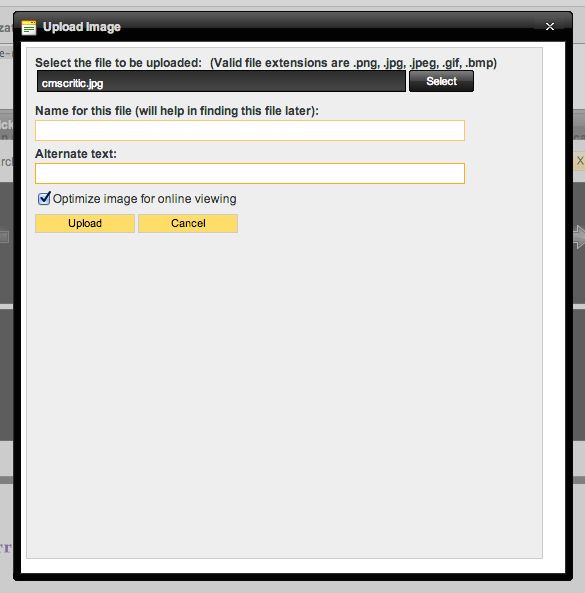
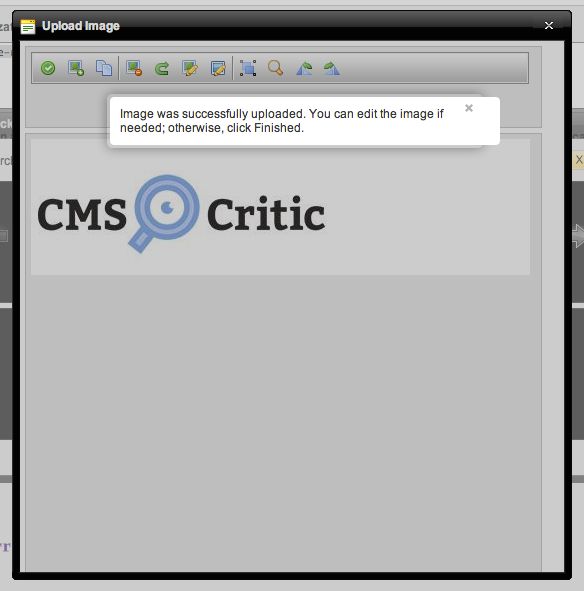
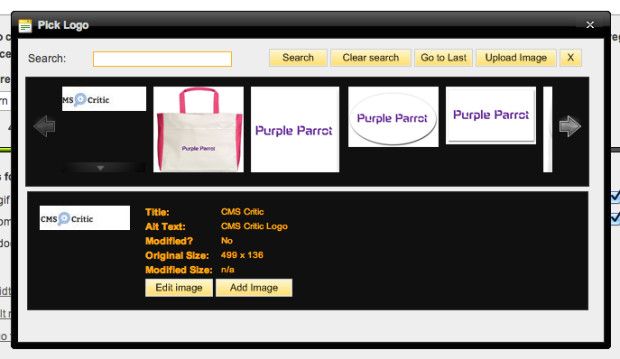
The logo upload process is fairly straightforward, if not a wee bit clunky.
Font Selection
Finally, I go to select my font. I find it a bit unusual that selecting a font takes me to a new edit page. Here's a look at it.
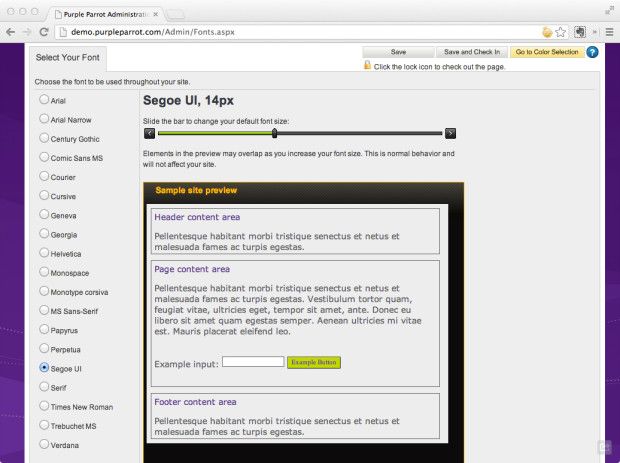
After choosing “Century Gothic, 14px,” I move on to “Go to Color Selection.”
Color Selection
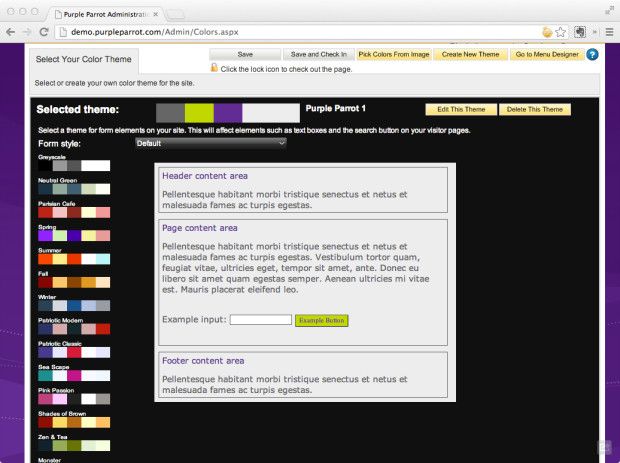
The color selection page allows me to choose color themes, which “will affect elements such as text boxes and the search button on your visitor pages.” Customization is available to “edit this theme.”
I choose the “Neutral Green” theme.
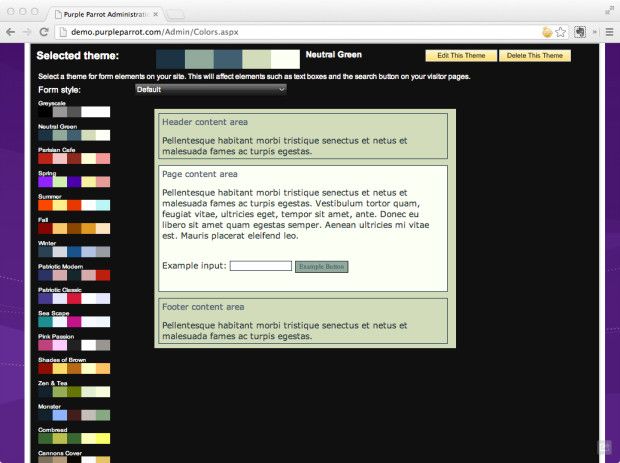
A word about navigation so far. The navigation does not immediately strike me as intuitive. However, as I have been creating the site, I realize that I am following the order of the menu elements under “Site Builder.” (See menu screenshot above). At this point, I've come to the “Menu Designer” element on the site.
Menu Designer
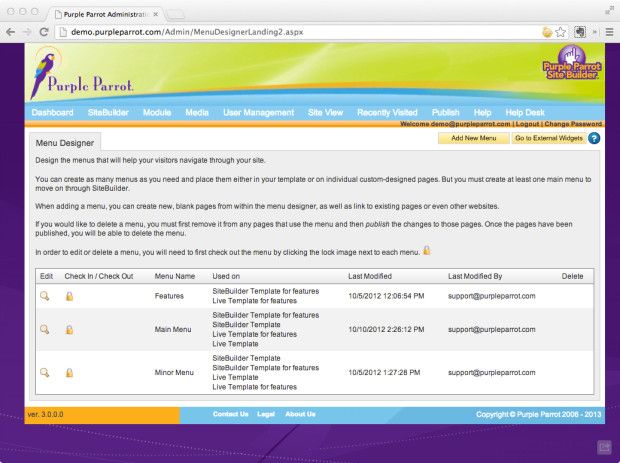
In order to edit an element of the menu, I first must click the lock icon. Then I click the pencil icon to edit the menu element. This brings up a new screen:
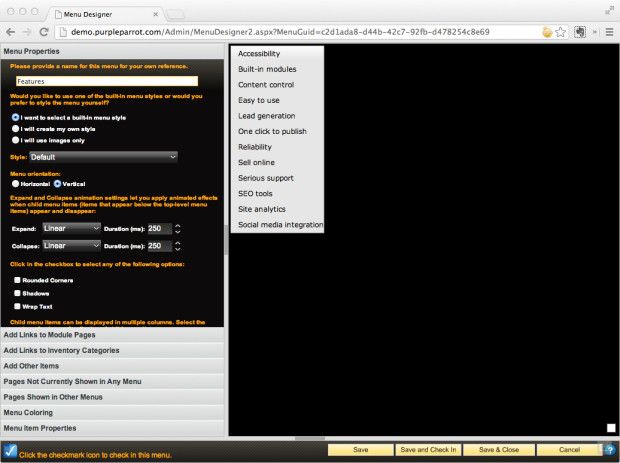
The right area of the screen displays a preview of what the menu looks like. Changes are instant.

The menus are prepopulated with the demo elements. I had to remove these one-by-one in order to create my own menu items.

Renaming menu elements required a multiple-click process. Each time I create a new one, I am redirected to the beginning of the process.

Overall, the menu customization is somewhat cumbersome and confusing. When I finish editing my menu elements, I click “Save,” and am prompted to click a lock again, click “Save & Close.” I arrive at the main menu designer page.
External Widgets
The next element to customize is “External Widgets.”
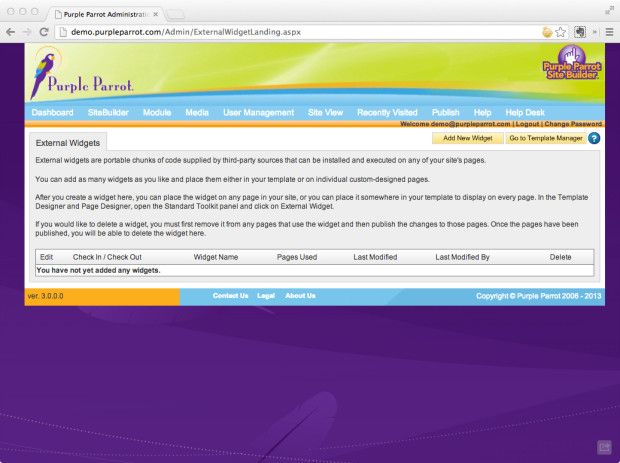
The widget option is helpful in that it allows a variety of codes to be added to the site. Purple Parrot allows an unlimited number of widgets. When a widget is added from this main External Widgets page, it can be added to any page on the site, or added to the sitewide template.
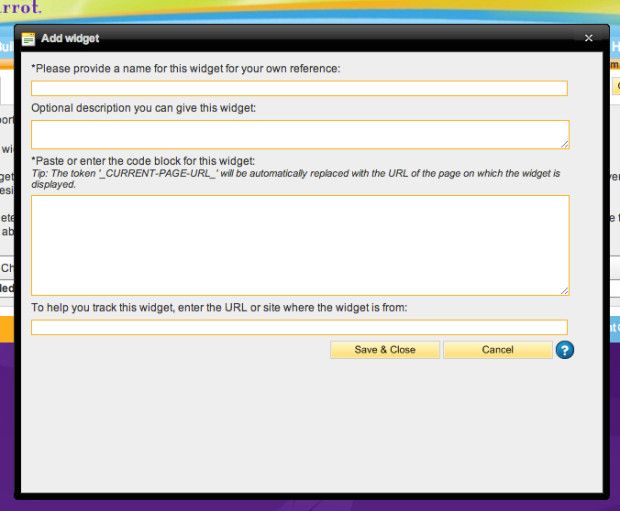
Adding a new widget prompts a popup to paste the code.
Template Manager
The next element for me to modify is Template Manager.
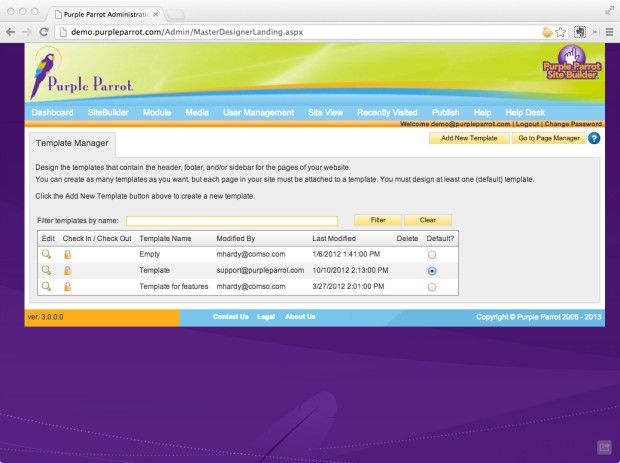
I am prompted to design a new template for the header, footer, and sidebar. The first step is to “Add New Template.”
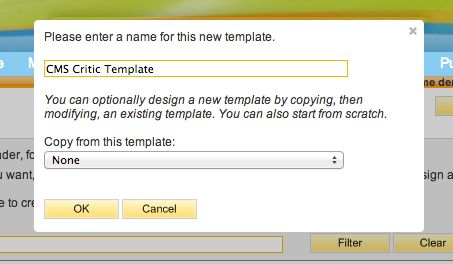
Once I add the new template, I can edit it after selecting it from the template list.
This is the template editing page.
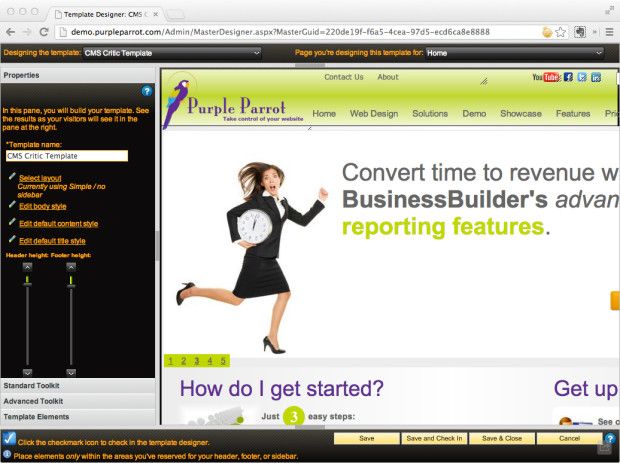
The persistent WYSIWYG preview pane is a helpful at-a-glance perspective of how the template customization is going. The downside of the large preview pane is that it allows limited space for customization.
Under template properties, I can select a background style, layout, and title style.
Under the Standard Toolkit Menu options, I am provided with the following toolkit items:
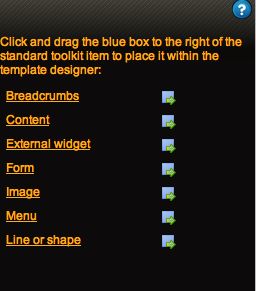
To add an element, I simply drag it to the live editing pane. Once I do, a setup box appears that allows me to customize that specific element.
Advanced Toolkit
Beyond these basics, I am provided with a variety of advanced elements.
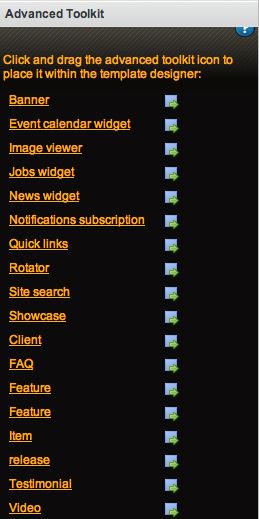
Each of these advanced toolkit options has its own unique set of customization options, similar to those in the basic toolkit.
Having finished my template design, I click “Save & Close.” I see a notification that my template was saved successfully, and return to the template manager page.
This process of template creation can be continued to create as many templates are desired.
Page Manager
The page manager menu furnishes me with a list of the pages on my site. The list seen in the screenshot below are the pages already created in the demo site that I have been editing. Each of these pages can be edited.
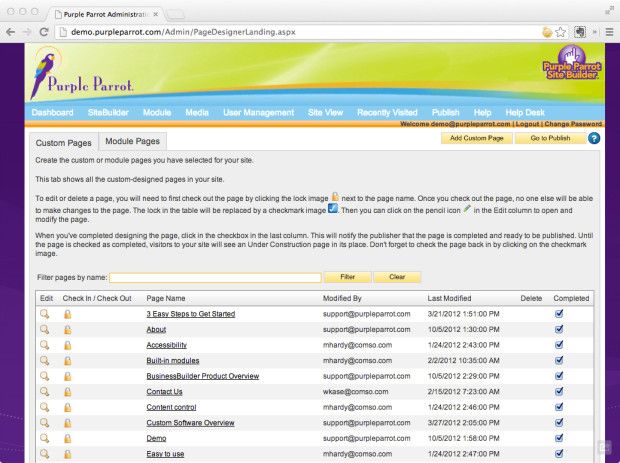
To edit the page, I first click on the lock button to “check out” the page. Then, I click on the pencil edit icon.
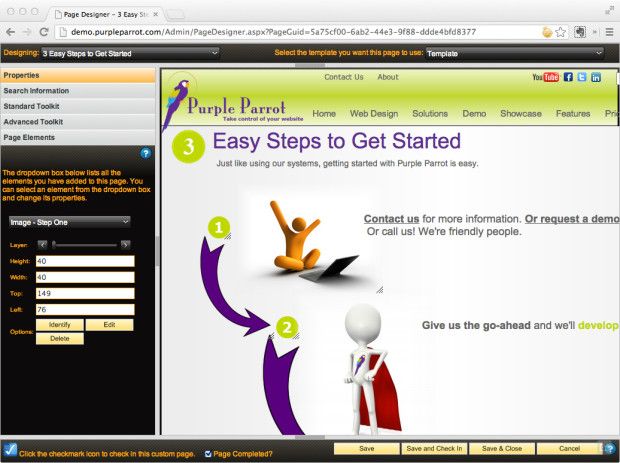
The page editor replicates many of the elements seen in the template editor. The options and editing options are simpler. One addition that is not part of the template editor is the “Search Information” for SEO purposes.
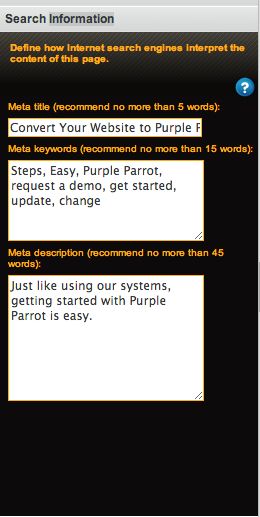
The standard toolkit and advanced toolkit elements are all available for adding to these custom pages.
Beyond the pages created for the site, it is possible to create special module pages.
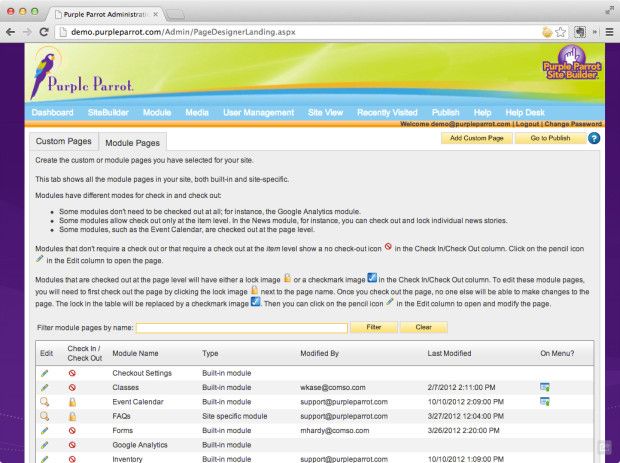
This completes the site creation phase. Depending on the extent of the site being created, this process can take a few hours or up to several days. There are a surprising number of options available. The level of customization is also impressive.
Publish
Having completed my site to my level of satisfaction, I click “Go to Publish.”
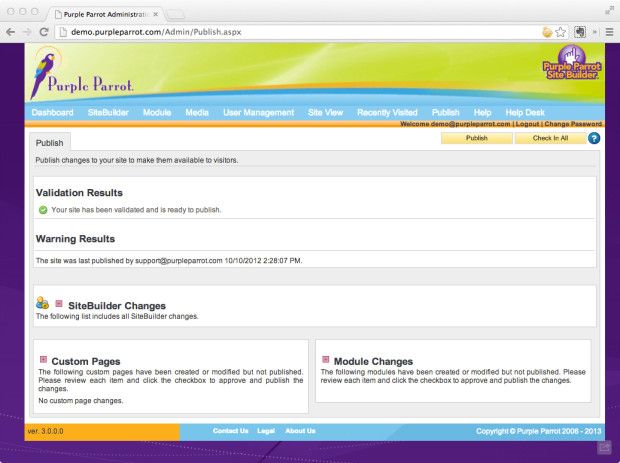
After receiving the publish confirmation, I can also view the custom pages and modules that were created or modified.
Modules
So far, I've only created the general site pages and structure. Purple Parrot has created an extensive list of modules that enhance a site's usability and versatility. Available modules are listed below.
- Checkout Settings
- Classes
- Contact Information
- Event Calendar
- FAQ
- Forms Manager
- Google Analytics
- Inventory
- Jobs
- Library
- News
- Release Notes
- RSS Feeds
- Showcase
- Social Networking
- Testimonials
- Video Catalog
- Media
- User Management
Back to the Dashboard
When I return to the dashboard after exploring every element of Purple Parrot, the dashboard makes more sense. It provides a way to easily access all of the features that are also included in the menu above.
Getting Help
The persistent top menu in the Purple Parrot admin provides two help menus — Help and Help Desk. (In addition there is a FAQ menu.)
Main Help Menu
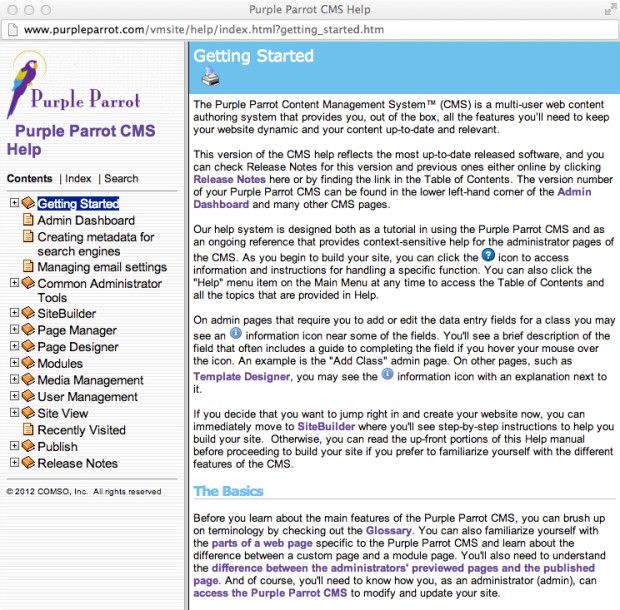
The help menu provides a readme style help document. It is navigable and readable, if not a bit Web 1.0-looking.
Help Desk
Help Desk is for registered users.
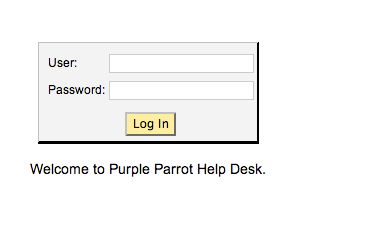
I was unable to test the response of the help desk.
Overview of Help Availability
One of the most helpful features of Purple Parrot was the way it guided users through each element of site creation and editing. Throughout the editing process explanations are included that describe what an element is, how it works, and what to do to make changes. Purple Parrot provides a good setup for users who have little web design or development knowledge to create an entire site with lots of features and considerable power. In addition to these consistent explanations, there are also question mark and information buttons situated at main junctions for further information.
Sample Sites Built with Purple Parrot
Listed on the Purple Parrot site are several organizations that have used their CMS.
- http://www.severnriverglobal.com/
- http://itsmalliancellc.com/
- http://www.clayhealth.com/
- http://www.mcecloans.com/
Conclusion
Pros
- WYSIWYG editing. Seeing changes as I make them is a helpful feature. Although viewing the actual sample site requires a few extra clicks, there are some editing areas in which WYSIWYG performance is available.
- Extensive module menu. I was impressed with the number of modules and the extent of power that they provided. This was, perhaps, the greatest advantage of the CMS. Purple Parrot is primed for power.
Cons
- Clunky. The advantages of Purple Parrot as a firm with 20+ years of experience is evident. There are, however, some areas in which this advantage could be a downside. Site navigation is confusing at times. Features of the editor are not at all fluid or easy. Some actions take multiple clicks, creating confusion and delays.
- No source code access. Although it is possible to edit a site to a detailed extent, it is not possible to dig into the source code. As a solution designed for the non-developer, it's fine. For those who desire more power, this may be viewed as a limitation.
- Lack of ready-made templates. One advantage of Purple Parrot is that they can convert an existing site to their CMS. For the user who doesn't have an existing site, they will need to either contract with Purple Parrot to create one, or try to make their own. There are no ready-made templates that I found except for a duplicate of Purple Parrot's own site in the demo version. This can create a hurdle. First, creating a site from scratch is time consuming and out-of-reach for those who have limited design experience. Second, having Purple Parrot create a site may not meet the user's wishes, due to the somewhat dated design style that is evidently used by Purple Parrot.
Overall, Purple Parrot provides a comprehensive and workable CMS. Pricing is provided in a three-tier model, depending on the user's needs. Purple Parrot may not be the first choice for those who want a polished look with quick-and-easy startup. Although Purple Parrot has a nice array of modules, it is lacking in design beauty and ease of use. I was disappointed and sometimes confused about how to perform a simple function. Furthermore, because of its design limitations and inability to create a responsive site, Purple Parrot will not satisfy customers who desire to adapt to mobile visitors. Unless this CMS make some significant revisions to adapt to updated design trends and mobile access, Purple Parrot will remain in a bygone era of web design.
You can visit Purple Parrot to find out more. To request a demo, you can fill out the demo request form.