Squarespace Review - the Long Awaited Commerce Solution
Squarespace 6 was released to the public last year on July 17th and was the winner of our 2012 Critics Choice Awards for Best Website Builder. Over 50 new features were added in the Squarespace 6 release, but there was one outstanding feature that everyone was waiting for: Squarespace Commerce. On Valentine's day 2013 they finally released it so we decided to do a new Squarespace Review.
“The ability to sell goods from Squarespace has been the most consistently requested feature throughout our history. We’re thrilled to be able to release a commerce offering we’re proud of.” – Anthony Casalena, CEO and Founder of Squarespace.
In light of all these recent changes since our last Squarespace review back in 2010 we have prepared an updated review, but first of all here is the current demo video for you to get a basic idea of what it can do:
Introduction Video
System Requirements
Unlike some other CMS reviews, like our WordPress or Drupal ones, for example, for this review, there was no need to download any applications to install on our servers. In fact they stated that they do not plan to release such a service. Instead they have streamlined their code to work efficiently with their own high performance cloud system and you do everything via your browser. Say goodbye to maintenance and updates taking up your time, Squarespace does that for you. You will, however, need to make sure your browser is compatible with Squarespace, which by the looks of things just means keeping it up-to-date (although at the moment they support both IE 9 and 10 for both viewing and editing). You can use Chrome, Safari, Internet Explorer or Firefox to work with Squarespace 6.
However for editing there are some additional system requirements:
- Cookies must be enabled for login purposes.
- JavaScript must be enabled for the site manager.
- Avoid running JavaScript blocking programs, such as anti-virus software.
New Features in version 6
I want to cover some of the new features that came with the Squarespace 6 release before I move onto the commerce piece of this review. I'm not going over the reporting feature as they are hard to demonstrate when you are the only one viewing the page. The option is available on the main menu and looking through it is fairly self explanatory, so I'll move on.
The Blogging & Layout Engine
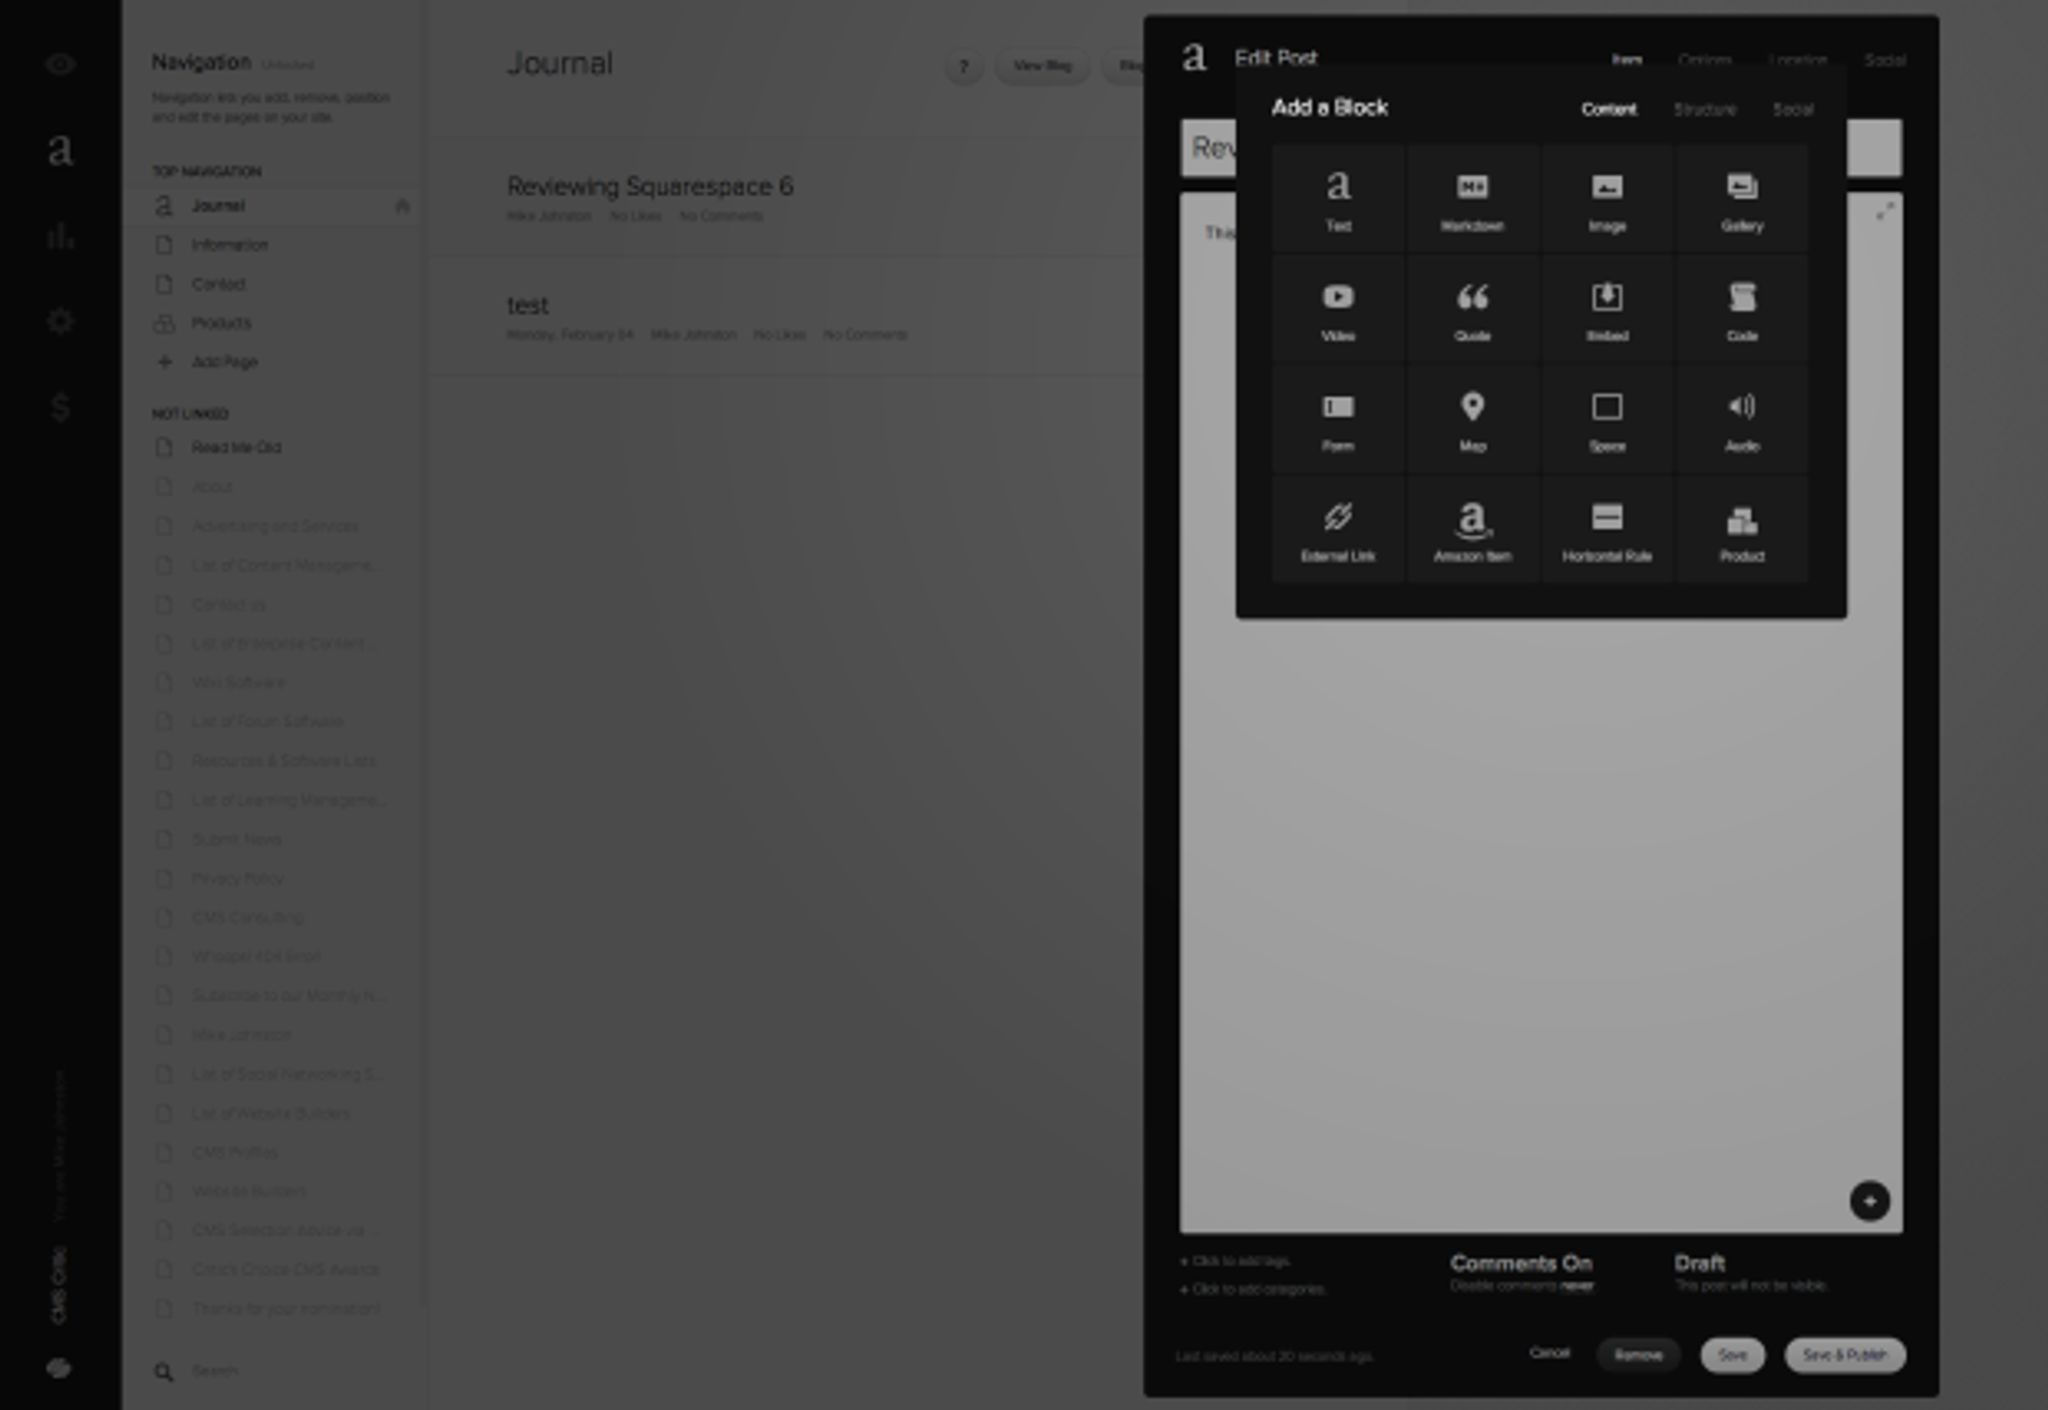
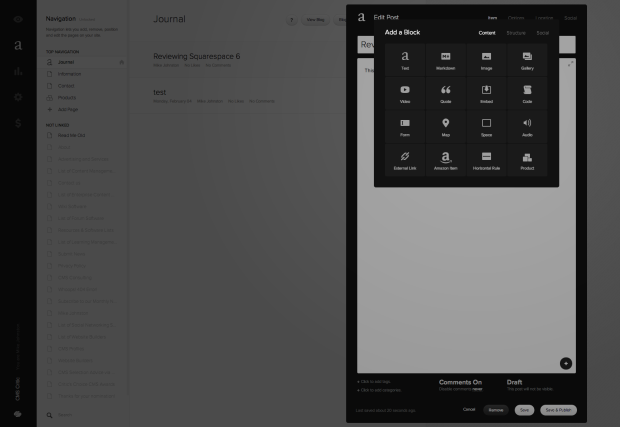
In Squarespace 6 they did an overhaul of the blogging engine, along with a new commenting system and multiple author support. You can change the way your blog is set-up via the ‘Blog Settings' button, such as changing the name of the blog (we called it ‘Journal'). This is a very intuitive feature that I really like about Squarespace 6. There are also 20 new templates you can use for your blog in this latest release. When I first tried creating a blog post it took me a moment to understand how to add images. My screen is quite big and I didn't see the plus symbol at the bottom of the big text box, or realise what it meant. This button lets you add ‘Blocks' from images to quotes, to video and code; you get a lot of handy options to build your post quickly. Once I figured this out it was fairly self explanatory exploring the rest of the block options listed below.
Editing a Post and Adding a Block:
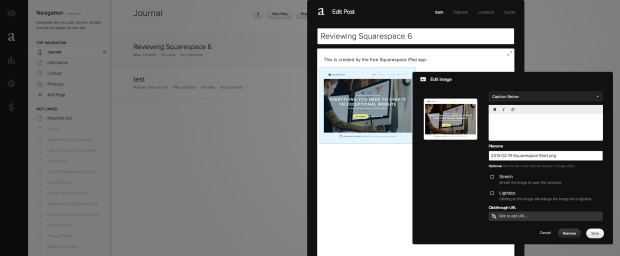
The new LayoutEngine lets you drop images onto your image blocks and once they are embedded you can drag them around to rearrange them in your post. The only thing I will say is that I was expecting their Media Management to be separate. I found myself looking for it in the menu structure and I couldn't find what I had seen in the videos until I tried adding an image block to a blog post.
Editing a Post and Adding Images:
Social Network Integration
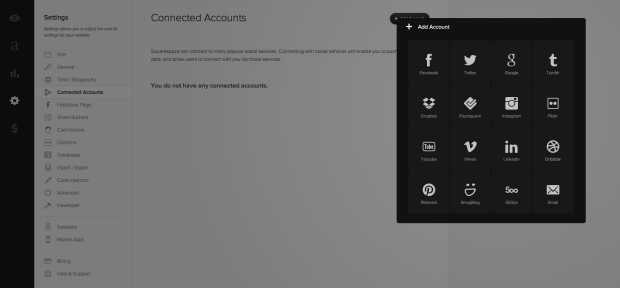
The other great thing about Squarespace is the social integration. There are again a wide variety social media you can tap into as you can see below. Whilst you build your website you are offered many ways to integrate your site into the social networks you connect to your Squarespace account.
Adding Social Network Accounts:
The Commerce Engine
To get to the Commerce section of Squarespace 6 you click on the dollar symbol on the left-hand side menu. This gives you a 4 step ‘Getting Started' process to get your store up and running quickly with options to: add products, select shipping options for physical products, connecting your Stripe account so you can accept payments and making your store live to the public.
Getting Started with the Commerce Engine:
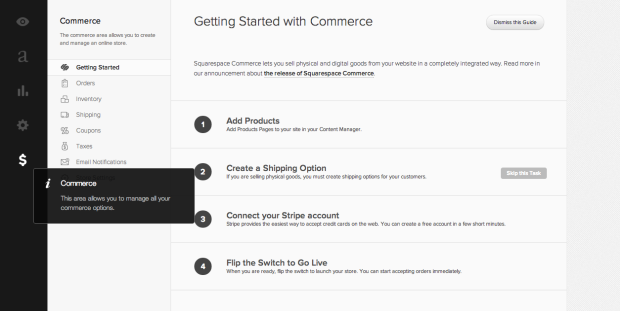
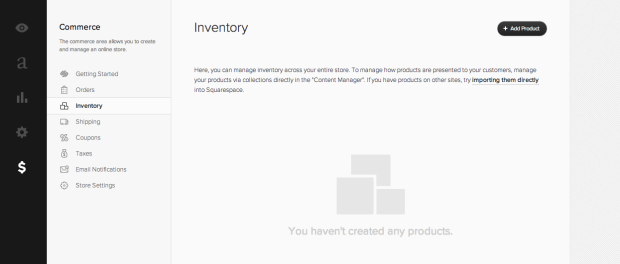
Getting Started is just the first item in the Commerce sub-menu. This gives you a way to manage your store and track your orders, inventory, shipping details, coupons for special offers, tax details, handling notifications and other settings. Everything you need to run your store effectively. So lets start with creating products. Before we can add products we need a product page to hold them. I didn't realise this and so got the following error when I tried to just add a product under Inventory.
Inventory (Before Adding Products):

To do this we need to go back to the content manager. Squarespace even provides you with a content specific tip when you over your mouse over the big ‘a' representing the content manger on the main menu. This is an unexpected but appreciated way to help you navigate the process of setting up your store.
Inventory Screen:

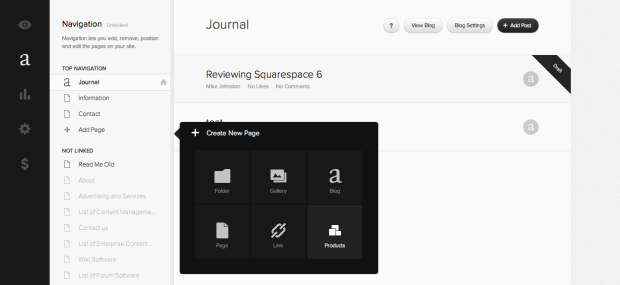
When you click on the content manager icon you then need to click on the ‘Add Page' option under the ‘Top Navigation' list. This will give you a range of page types and in this case we want to click on the ‘Product' option.
Creating a new Page:
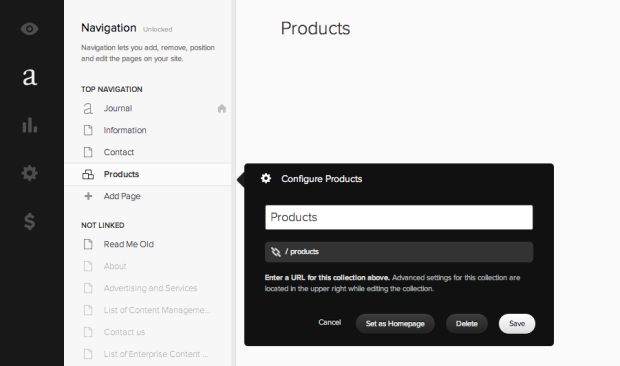
You will be asked to enter a name for the page, which will correspond to the search friendly URL it will create for the page, although if you wish you can alter this to be different than the page's title if you want. It also gives you the option to set this page as the homepage of your website.
Configuring Products:
Now that we have the product page in place we can create products. When the products page is created is creates a new option under the Top Navigation in the Content Manager called ‘Products', which has similar options to the Inventory page in the Commerce section.
Adding a Product:
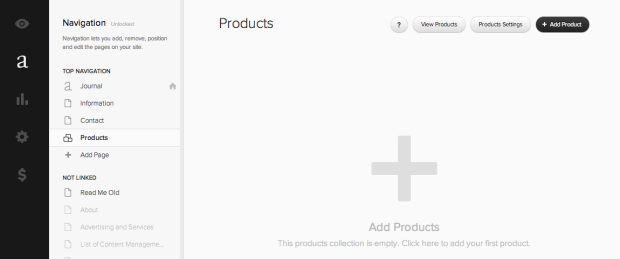
Since you are taken to this page immediately after creating the Products Page you might as well create your products from there, but you could equally go back into Commerce menu to do the same. Whatever menu you choose however, you will see on the top right a button called ‘Add Product', that is what you need to click.
Adding Products into Inventory:
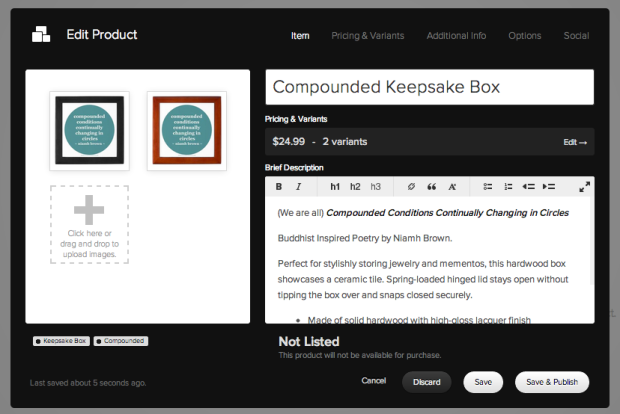
You will then be given a choice between creating a physical product that has to be shipped, or a digital product. With a digital product the customer will get a download link sent to them via email that is valid for 24 hours. In this review I'm going to create a physical product so I can cover the shipping options as well. You then get a screen where you can edit all the details of your product. Across the top on the right there are a number of different steps, the first of which ‘Item' lets you describe your product, add images, add categories for your product (see bottom left) and an options to make the product visible or not in your store.
Editing a Product:
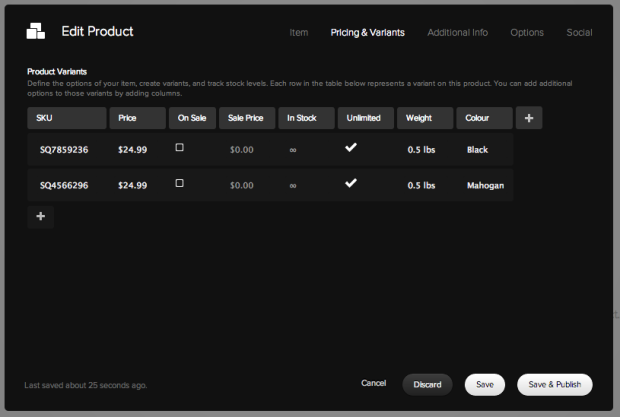
You can set the price here as well, but if you plan to have more than one variant, in size or colour for example, you might want to wait until the next step. When you hit save you go to the ‘Pricing & Variants' step. In the example below I added a column called ‘Colour' as my example product comes in black and Mahogany. You can do this by clicking the ‘+' symbol on the right of the column headers. I then set the price and stock details for each variant by clicking on the ‘+' on the bottom left underneath the headers and filling out the different colour variants.
Editing a Product Variant:
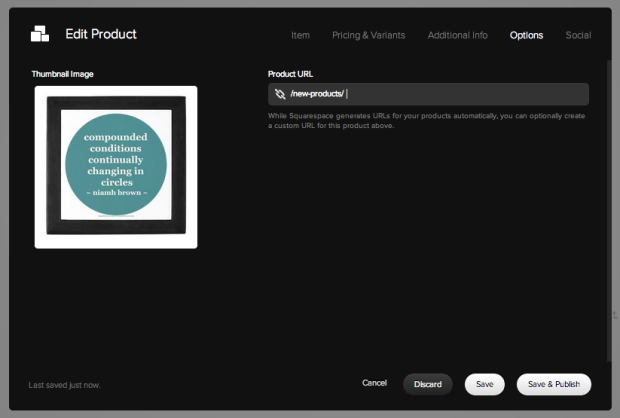
The next stage just lets you add rich text notes for additional information., there isn't much more to say so I'll skip over this stage. Next comes the step to set the URL address of the product. This seems to have an issue because it is set to ‘new-product' by default and you can't seem to edit this, regardless of what you set your product page URL to be. I had removed the ‘new' from ‘new-product' in my product page, but found I could not do this here. I was able to type something after ‘new-product' but it wasn't ideal. It also seemed to put a space between ‘new-product' and what I entered but it is just a display issue (when I later checked the product once it was live, the space was gone and ‘new-products' was replaced with just ‘products', as I had set it up on the products page, which could cause some confusion).
Adding a URL and Image to your Products:
You then have the option to publish your product via your social connections, and if you haven't set any up it gives you the option to do so. You will need to make sure your product is saved before you navigate away from this product wizard. When you have completed filling out the product details hit ‘Save and Publish'. You can then go to your inventory to view the product.
Inventory with added products:

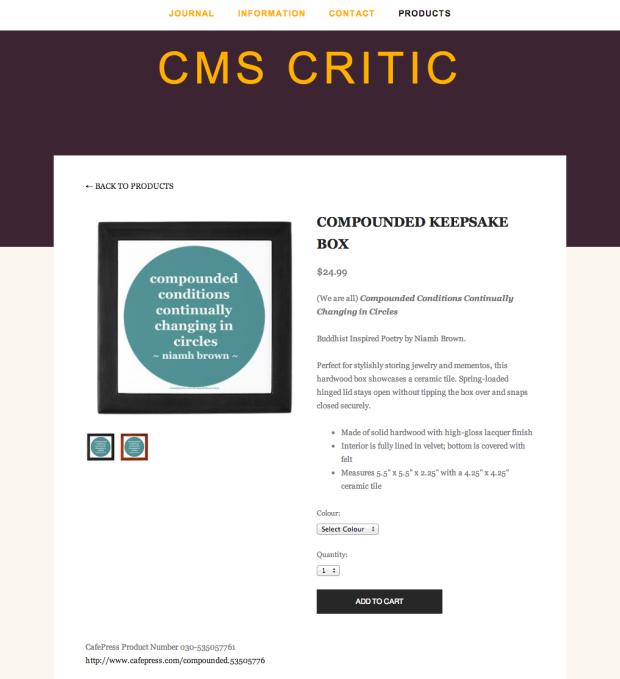
If you made it available so people can find it on your store then it will also show on your products page. If you click on the product it will look like this:
The End Result:
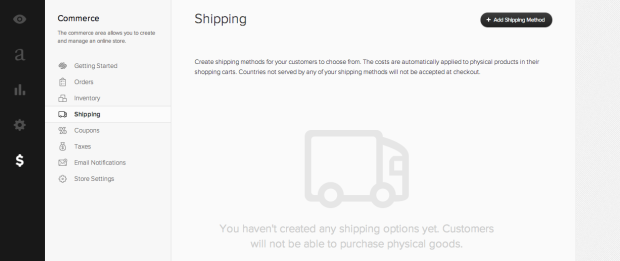
Now we want to move onto shipping options. Click on the Commerce symbol on the main menu and then select Shipping. On the top right is a button you want to click called ‘Add Shipping Method'.
The Shipping Portion of the Commerce Engine:
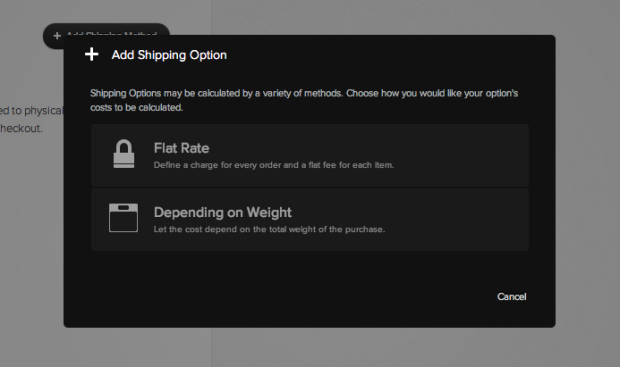
You then get two options for shipping: ‘Flat Rate' whch lets you set a single price for shipping costs, or ‘Depending on Weight' that will determine the cost based on how heavy a product is.
Adding shipping options:
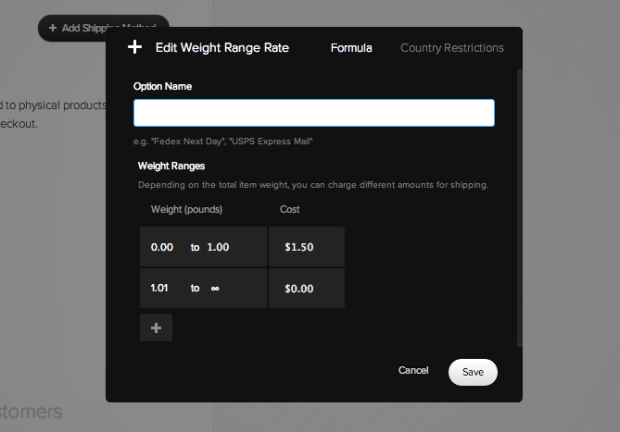
I've chosen the second shipping option, as the flat rate option is pretty straight forward and most of it's functionally is the same as the weight based shipping option. You get the option to set weight ranges and the rate each one will cost. You can add more option by clicking the ‘+' symbol below the first two weight ranges it creates for you by default. You have to set a name to determine what postal method this delivery option will use, such as FedEx. This is a mandatory field.
Editing the weight range rates for shipping:
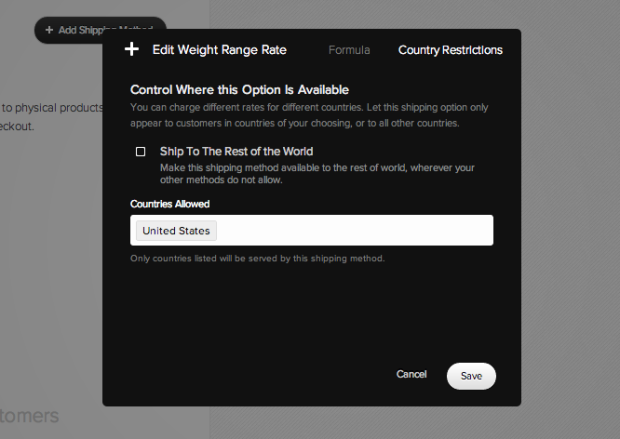
Then there is another step at the top right called ‘Country Restrictions' which lets you say which countries you will deliver too. Remember that you can create more than one shipping method, so you could create different rates this way for USA, europe and worldwide, for example, if you need different pricing for each of them. Once you have saved all your option is will show up in a list under the Commerce Shipping menu.
Setting Country restrictions:
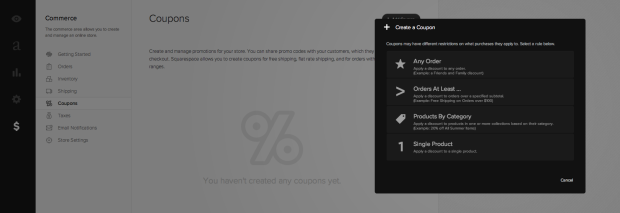
I want to briefly cover the rest of the options under Commerce. You have the option to make your own coupons for special promotions and sales etc. They actually give you a vast range of types to choose from, that gives you a lot of power to promote your products. They then give you even more choices, whether you want to offer free shipping, a percentage discount or a flat dollar discount.
Creating Coupons in the Commerce Engine:
Moving onto to Commerce Taxes. You can set how much tax will be charged for your products on a state-by-state basis (and is therefore limited to the USA only). They also give you the option to charge sales tax on the shipping costs.
Tax Rule Editing:

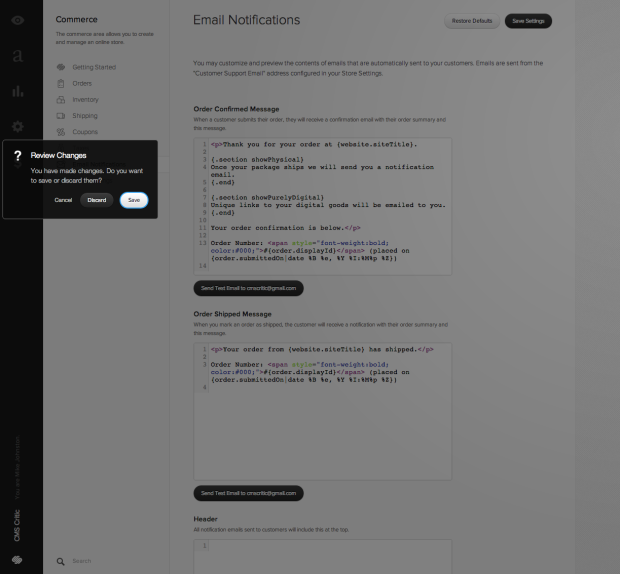
We now come to Email Notifications. This is where you can customise the text that will be sent out to customers, including header and footer options. There are two message templates you can tweak for emails that are sent to the customer regarding order confirmation and shipping. I did notice a little issue here. If I click on email notifications and then cancel without doing anything, and error will pop up asking to save or discard changes when none had been made. I found discarding didn't do anything untoward as far as I could tell so I just used that.
Setting up Email Notifications:
The last menu under Commerce is Settings. From here you can configure the setup of your Stripe payment account, support email address, express checkout option and setting the shopping cart to a dark or light style, depending on what colour scheme the reset of your website is using. You can integrate your MailChip newsletter account, get stock level alerts to remind you when to stock up on physical goods. Lastly it lets you write your own terms of service, as well as privacy and returns policies. If you judge your settings and notifications just right, you can communicate your style and values in a more interesting way.
The Final verdict:

This was my first time using Squarespace so I had a fresh eye that had not been accustomed to earlier releases. I can see why millions have flocked to Squarespace, because you can create any kind of website regardless of technical ability. The only downside for me was that the payment option they use for Commerce is restricted to the USA only. It's not clear if this is because of limitations in Squarespace 6 itself, or due to Stripe, the payment vendor they are using. I also can't get LastPass to work with the login form whilst using Chrome, my preferred browser. This has me going back and forth to my emails to find the password each time I want to login. However I think the issues I've found are minor details that are possible to address in the future, so I'm willing enough to over look them until they broaden the scope of Commerce to include payments to Denmark, which is where I live.
Squarespace caters to developers too, so you can delve deeper into it to get even more functionality and customization. As a developer, you can build your site for free until you go live. Whether you are a developer or not after the trial the monthly subscription cost varies from $8/month up to $30/month, depending on which of the 3 plans you choose and if you pay monthly or annually. So for the same monthly cost of a low bandwidth Virtual Private Server, which you would have to administer yourself, you really can have your cake and eat it with Squarespace 6.